Secrets, Tips & Tricks

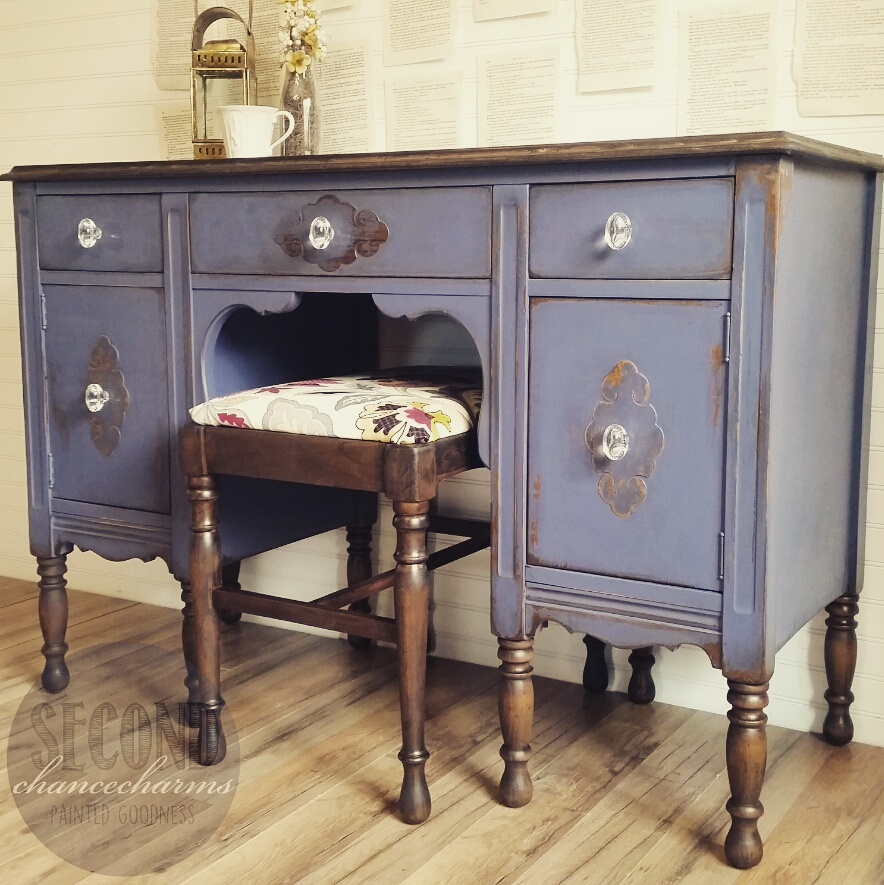
I get many questions on the “How To’s” of things; what products I use and the process I do to complete my pieces. Back in August of 2016, I shared with you how I refinished the Vintage Vanity and Stool Tutorial. Today I will share with you what steps I took to complete this farmhouse chic master suite bedroom set.

Client Photos:

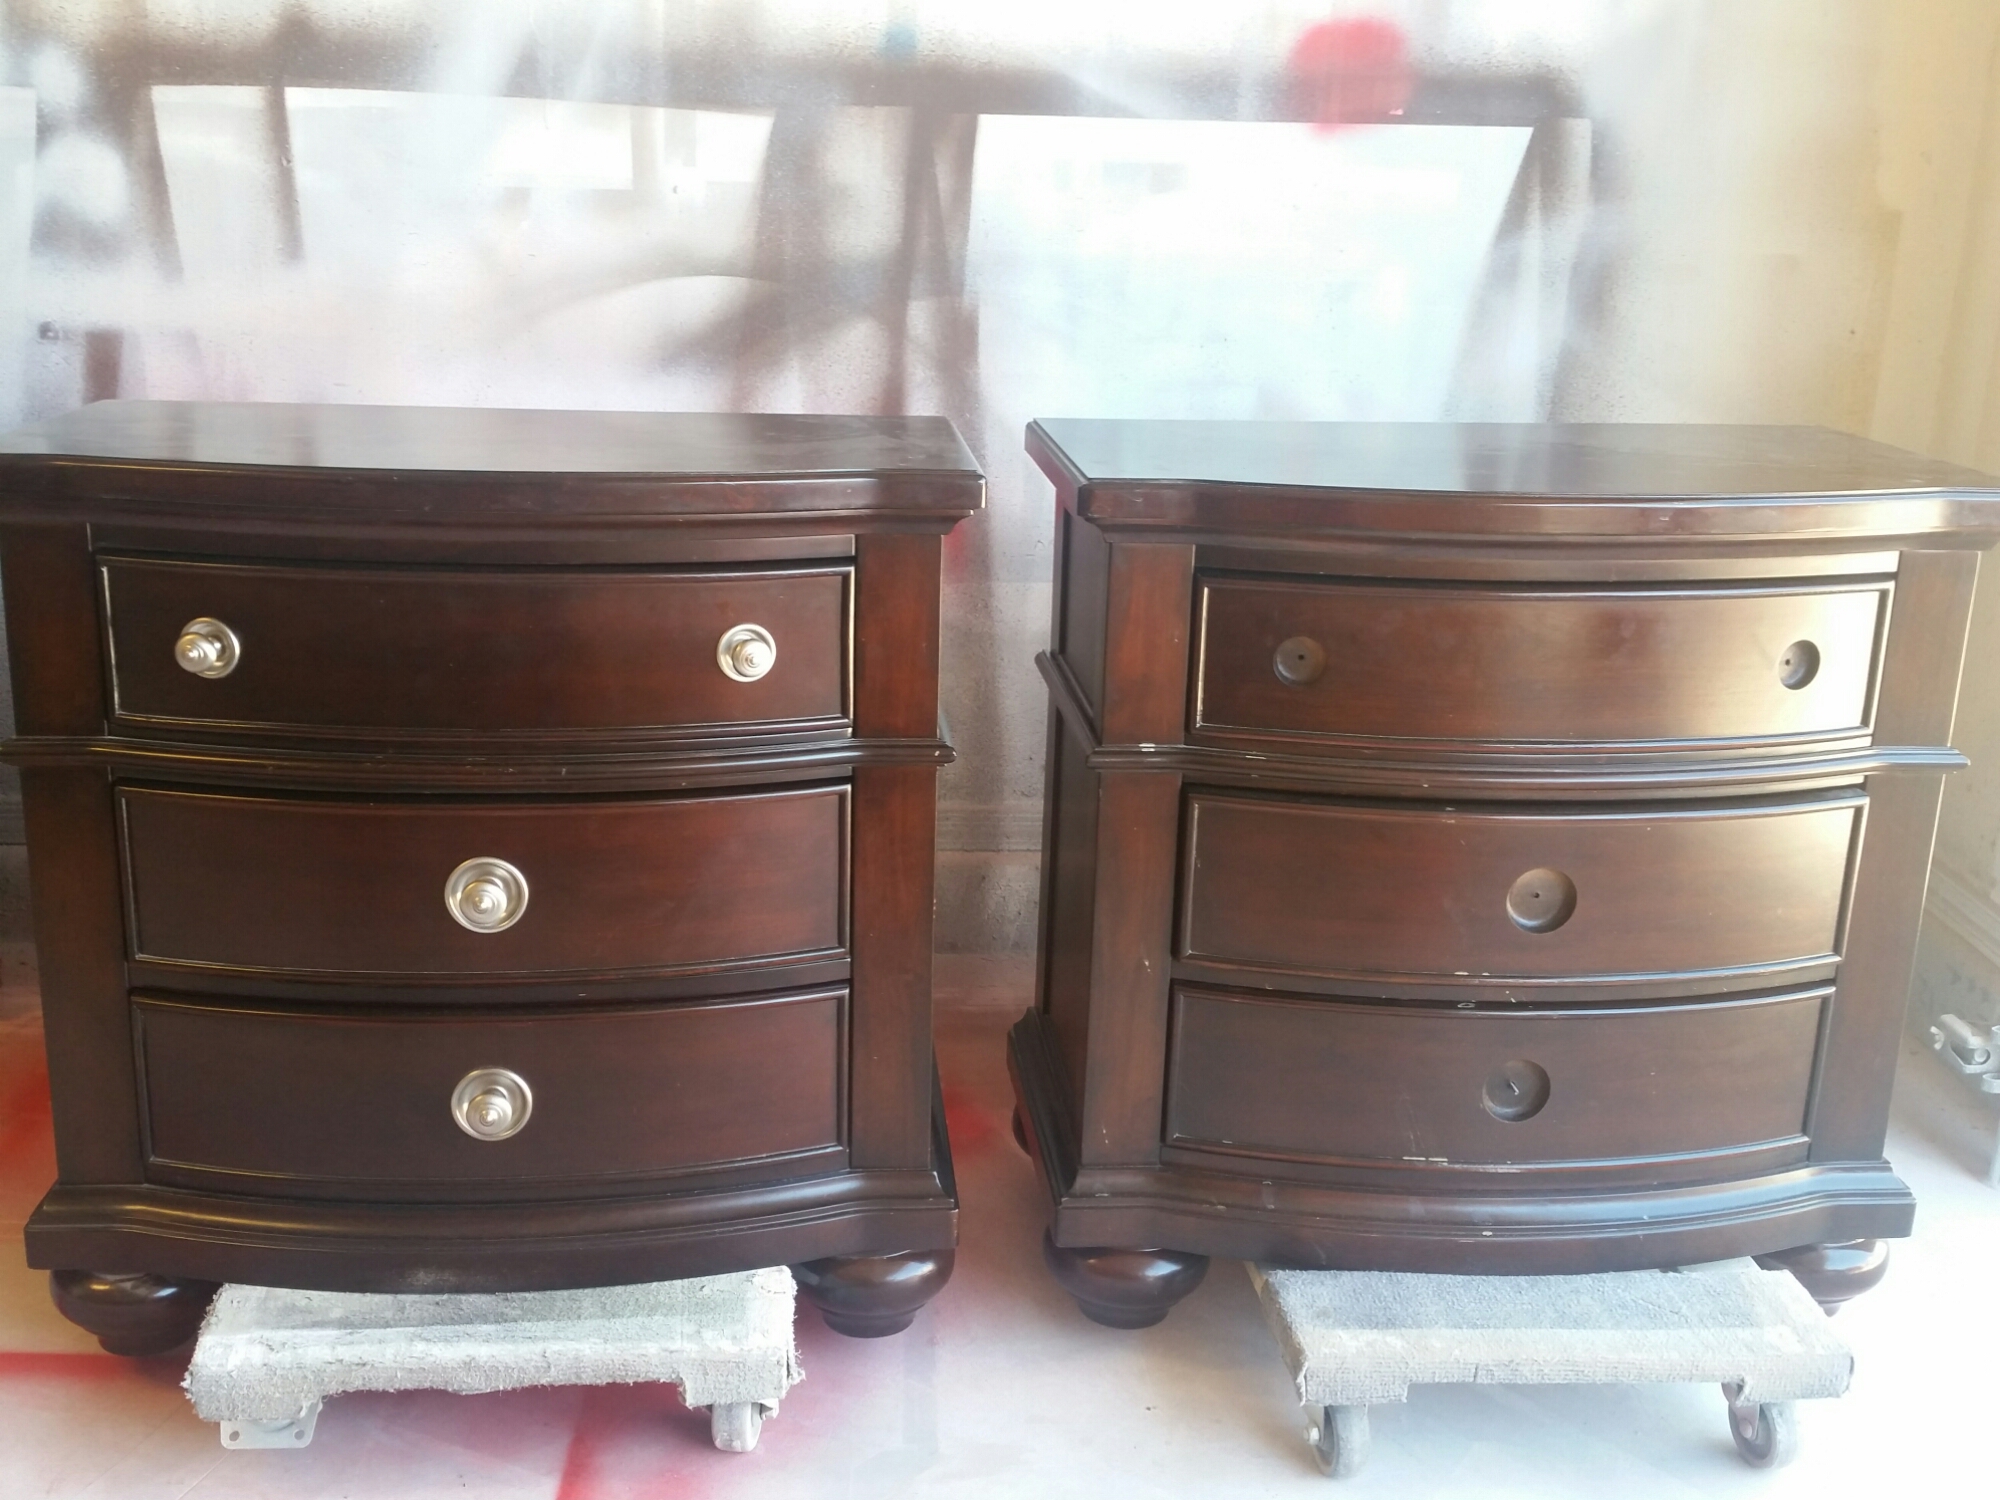
Before pictures of the 8 Drawer Dresser, 2 Nightstands and a King Sleigh Bed frame.

This slideshow requires JavaScript.

Starting any project, I remove all hardware first. It may be the easiest step consisting in using a Phillipshead or Flathead screw driver, but that is not why I enjoy it. This is the time where I get a feel for the piece that I am working on. I learn where the scratches are that may need to be filled. Or take note on which drawer slider is broken or missing. If I am working on a piece of furniture that I will put up for sale in Shop Selections, this is the time where my vision usually starts to happen for that particular item. I become one with my blank canvas. Don’t make fun! I am getting personal here. It’s few and far between where I will see pieces that I purchase during my treasure hunts and KNOW exactly what needs to be done to bring him or her a Second Chance in that moment. Such as these pieces: Dresser turned Media ConsoleNavy End TableBaby Changer and Antique Dresser with Mirror.

I swear I could hear “pick me, pick me”- make me into *BAM* the vision hits.

After removing the existing knobs to the sleek traditional bedroom set my clients piece was left with huge holes where the knobs came from that we of course didn’t want. Plus the placement wasn’t going to work anymore for the knobs and pulls my client had picked out. I filled those holes in with Bondo.

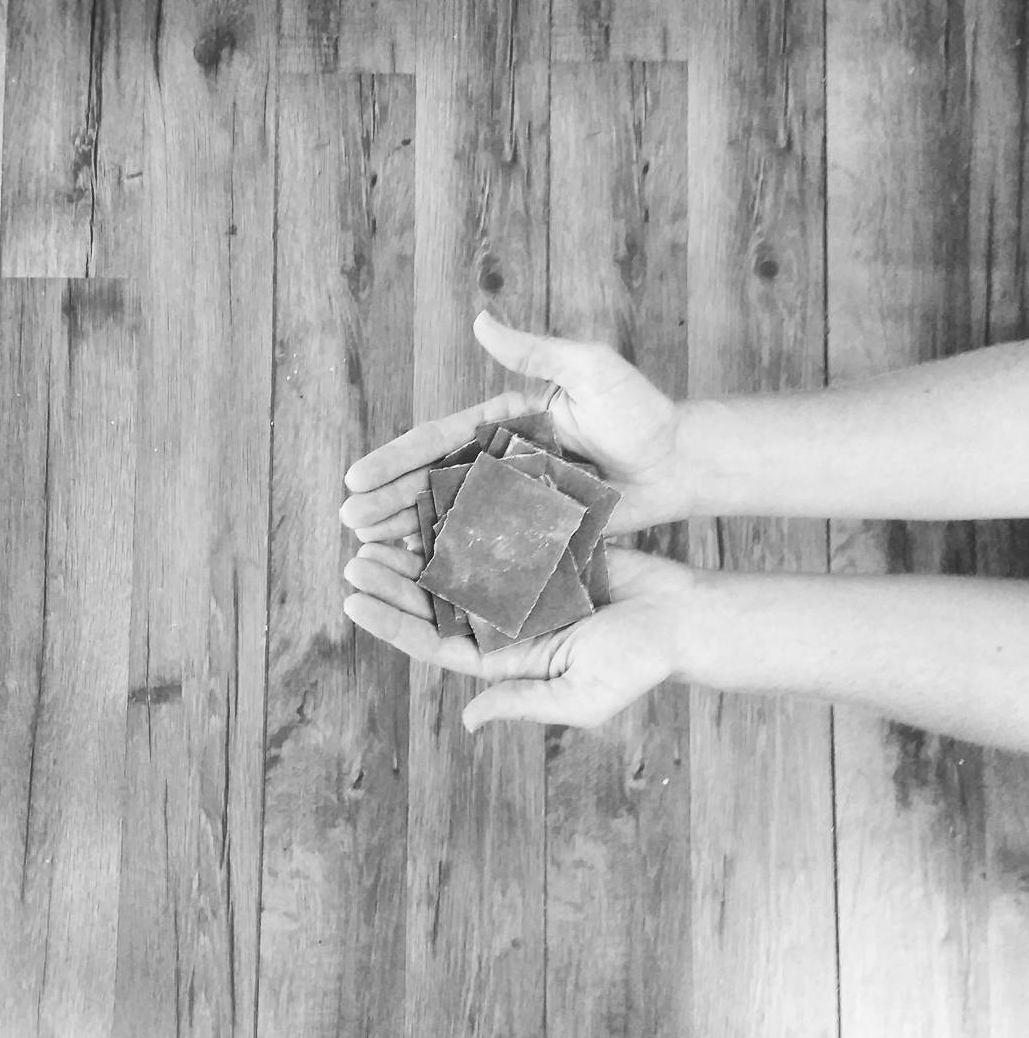
Believe it or not, I love using Body Filler for cars bondo. Crazy right!? This stuff sticks, drys fast and sands down great for a smooth even finish. Of course use a high grit sanding paper like 80 grit at first and work your way down for a soft finish using 150 grit. I continued the sanding on the entire piece to remove chips, gauges and scratches. A light sanding is perfect- you don’t need to get down to bare wood (unless you were staining.)

Once the sanding has been completed I clean my furniture pieces with TSP. A heavy-duty cleaner that will help remove any gunk, grim and the shine! This will help ensure that your distress finish stays and lasts for many generations. I use this on ALL my pieces! Even the solid and glazed finishes.

Once completely dry its time for paint!!! The fun part right!? I use a paint sprayer for my pieces. I have gone through a handful of different types and enjoyed them all in their different ways. I can say I am a Graco Girl, I love the even smooth finish a commercial paint sprayer leaves behind.

I also use Sherwin- Williams Paints made for furniture. I have used their brands such as Solo, Snapdry and Proclassic. I must say Proclassic is my favorite and what I use most often, unless the color tint chosen by myself or my client permits it; such as using dark colors. The paints I use are made for cabinetry, doors and baseboards; high traffic areas that will need to be able to withstand sticky little fingers, excessive cleaning and the daily normal use life gives.

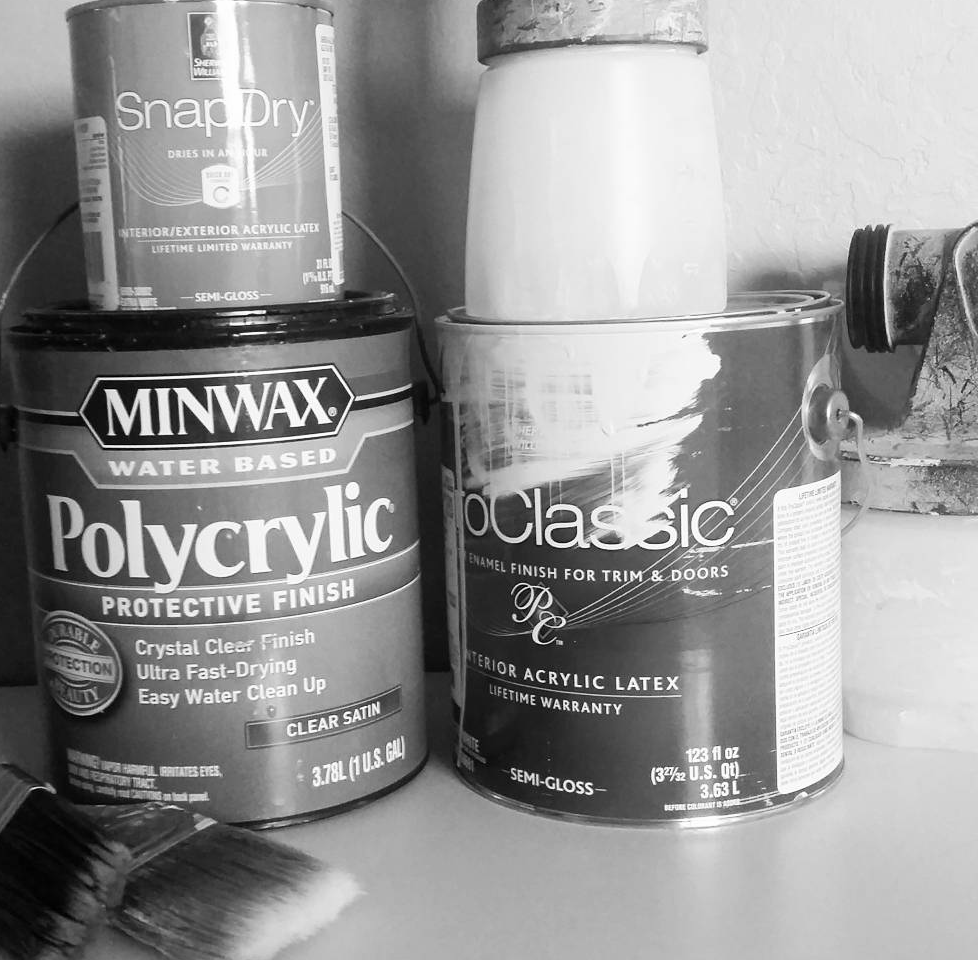
There is no annual waxing that would need to be done; other paints on the market need to have certain types of up keep to maintain its protection. The paints I use have a sealant, if you will, in them. There is no need to seal them with a polyurethane, however you can. Make sure to use a water base polyurethane- this will keep from turning yellow over time like what an oil-base product would do.

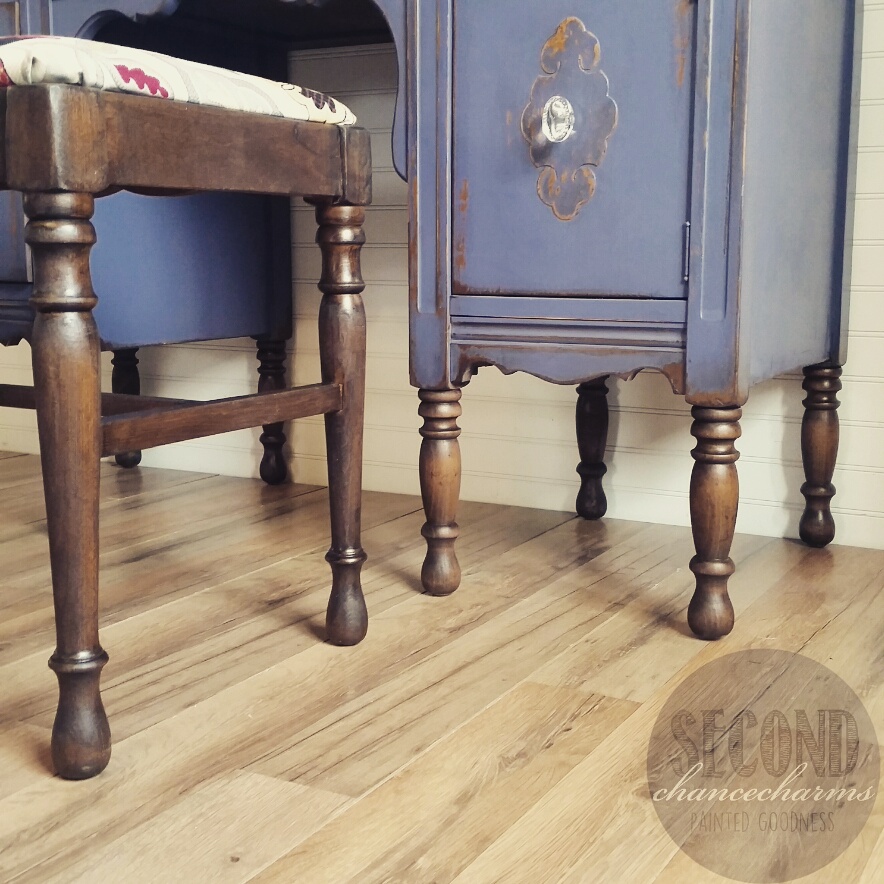
My client chose Sherwin-Williams Reflection for her bedroom set. She also picked out these adorable knobs and handle pulls that I seriously can’t get enough of from Hobby Lobby!

Most times I will use the existing hardware on pieces and revamped them in a color because it is a heck of a lot cheaper and can create a new look. You could also polish them and bring the hardware back to its original state, which I have done in the past like on these pieces:

Lighting creates color. I have about 10 paint books that are consistently coming and going for my clients. I encourage them to look at the color they want during all times of the day. As light shifts, both natural and artificial, the color will change its appearance. Its basically like this: Light creates color, without light we would have darkness. Hens your white to black hues. I do offer Color Consultations where I come to your home and help you pick the best color for your lighting.

When the paint has completely dried I distressed the pieces. I use a 150 grit sanding paper. I like to use little small pieces and distress in the lines and on certain areas, making sure it doesn’t look “cow-like” as I like to call it. I don’t like the uniformed spotty look. There are many ways to distressing furniture, and I have seen many different styles, I am just sharing with you what I like to do and what I think looks gorgeous.

Once I am happy with my distressing I measured and drill my holes for the knobs and pulls. Once all hardware is in place I step back and my heart- yet again- drops.

This slideshow requires JavaScript.

I love what I do! I hope you enjoyed this blog post, leave me your comments and questions down below. Tell me what Secrets, Tips and Tricks you would like to see next, perhaps Glazing?

xoxox

Rebecca

Vintage Vanity and Stool Tutorial

Refinished vintage vanity and stool. Come check out my process on this Second Chance Charm!

Finding great pieces of furniture is a process in itself! It takes a lot of footwork and time. I scored this lovely piece and I fell in love at first sight! She came with her original mirror too (not pictured).

imageLike all my pieces, I will post them up under “Customization” first. Meaning, my clients can view my pieces that I have available and choose to purchase them and have them customized to their liking. With this particular piece, she didn’t sit long. I had a client contact me via Facebook in regards to this piece and another piece I had up, a buffet. I went over to her lovely house for a Color Consultation to help her choose the best color for her lighting and talk about what she expected to have. I love doing these consults; I get a prefect idea of my clients style by seeing their home and decor. My client wanted a statement piece. First thing to see when walking in her home. She wanted to go bright and bold with stain and distressing. We sat on her floor in her entry way giggling and getting excited for all the possibilities! Once I had understood her ideas it was time to work!!!

Like all pieces of furniture that are to be refinished, its extremely important to make sure the prep work is done correctly. This process ensures that your paint will cure correctly and last another lifetime as it needs to adhere to your media, whether it be wood, laminate, formica, metal etc.

With all pieces that come into my shop, whether it be one I have up for customization or one that a client brought to me, its important to me that I fix all broken parts. Drawer sliders, doors, legs, tops… you name it- it gets fixed to work like the day it did when it was built the first time. Even though this might be a second hand piece, that doesn’t mean it needs to act and look like one- that is the Second Chance way! This vanity had seen better days. Some of her veneer had been lifting and peeling off. (Below is the only picture I have where you can see the veneer lifting up, on the inside of the vanity where the stool would sit. Oh- and there is her original mirror!)

imageI went ahead and scraped off all the lose ends of the lifting veneer with a puddy knif and filled that area with Wood Filler. Once the filler had dried, I sanded it down to a smooth surface using 80 grit to a 150 grit sanding paper.

image

imageMy client wanted the vanity top and legs to be stained. With my pieces I like to use oil base stain so you can see the real wood grain. It makes the grain look rich in color! I usually start by sanding down the top using 60 grit sandpaper. However, in this case, since the top was a thin sheet of veneer, I used 80 grit and worked my way up to 200 in three stages. You can easily go through veneer and ruin your top, so its important to use light pressure. The reason you want to use multiple sanding sheets is the higher number will get the previous seal and the old stain off. It opens the pores, so to speak. By using a finer grit it helps close the “pores” and makes for a prefect look and smooth feel.

imageOnce the top was sanded, I started to work on the legs. Because of the curves and design of these beauty’s, I had to sand by hand… On all 12 legs. Those days were a blurr… I used 3M sanding paper which is an amazing product!

image

Depending on what style my client desires, this determines if I need to prime the furniture or not. With distressed pieces, which is in this case, I do not prime. When distressing all layers of paint would show through (more on that later). After the prep work is complete its time for the part everyone loves! PAINT ALL THE THINGS! *yes, I shout this and wave my arms in the air*.My client chose Sherwin-Williams Mineral Gray at our Color Consultation. I adore color and for a statement piece- its perfect!!! I use a commercial sprayer for all my pieces. It gives me an even coat, flawless coverage and a smooth feel. I usually only have to do about 2 coats.
Once my paint had cured its time to distress! Distressing is when you see the wood underneath the paint come through. There are many ways to distressing a piece. In the fine lines, only is areas that have a high traffic touch, all over etc. I have found that all refinishers have their own style, making them their own artist. Perhaps there is no right or wrong way to distressing a piece. If it pertains to your client base and makes you love your style- then that’s all one could ask! I like to have my distressing in the lines and around areas of high use, like the legs and drawers.As a courtesy to my clients I send them progress photos in all the main stages: sanding, priming, painting, detailing and the final reveal. I like to start light in distressing and send them updated pictures. This is the time where they can really start to see their creation come to life. If they want more distressing they can tell me at this point, or tell me- its lovely the way it is. This goes for glazing as well. (more on glazing at another time). My client wanted a light distressing on this piece. The way I distress is using a fine grit like 150 in small little paper pieces sanding off the paint by hand. It takes time, but you have more control and by using a lighter grit sanding paper it doesn’t chew up the paint around the area where you distressed through to the wood. Leaving a total smooth coverage from wood grain to paint. Patience is perfection.

Time for staining! I remove all my plastic that is protecting the stained areas. I love to use Minwax oil based stain. On this piece, my client chose Dark Oak stain. I started with the legs first. First, I gave another wipe down on each leg to free of any debris and used a sponge brush to make sure I get in all the grooves on the legs with stain.

Once the stain has been fully applied on the area I waited about 3 minutes, the longer you wait, the darker the stain will become from soaking into the wood. With this piece I didnt want it too dark, you can always add more coats for a darker color, so starting light is smart. I used a rag to remove any access stain.

image

imageOnce all my legs were stained I moved to the top of the piece. Using the same technique; a wipe down using a clean rag, stained using a foam brush, allowing time for soaking in and then using a clean rag to wipe off extra stain. (Note: its really important to keep stirring your stain can to keep from the color separating.)

image

imageLet your freshly stained areas cure for at least 8 hours. Then you can seal the stain with polyurethane.

I reupholstered the stool with upholstery fabric my client found from Joann’s Fabric Store. We also had enough left over that I went ahead a used it as drawer liner. I used Krylon High Strength spray adhesive in the drawers to attach the fabric as liner.

The most rewarding part of all this work is installing the hardware and taking a step back to see the final piece, in all her glory come together .
My client had chose these gorgeous crystal knobs for her vanity along with this fabric for the stool.

What do you think of the final piece!!? I am in love!