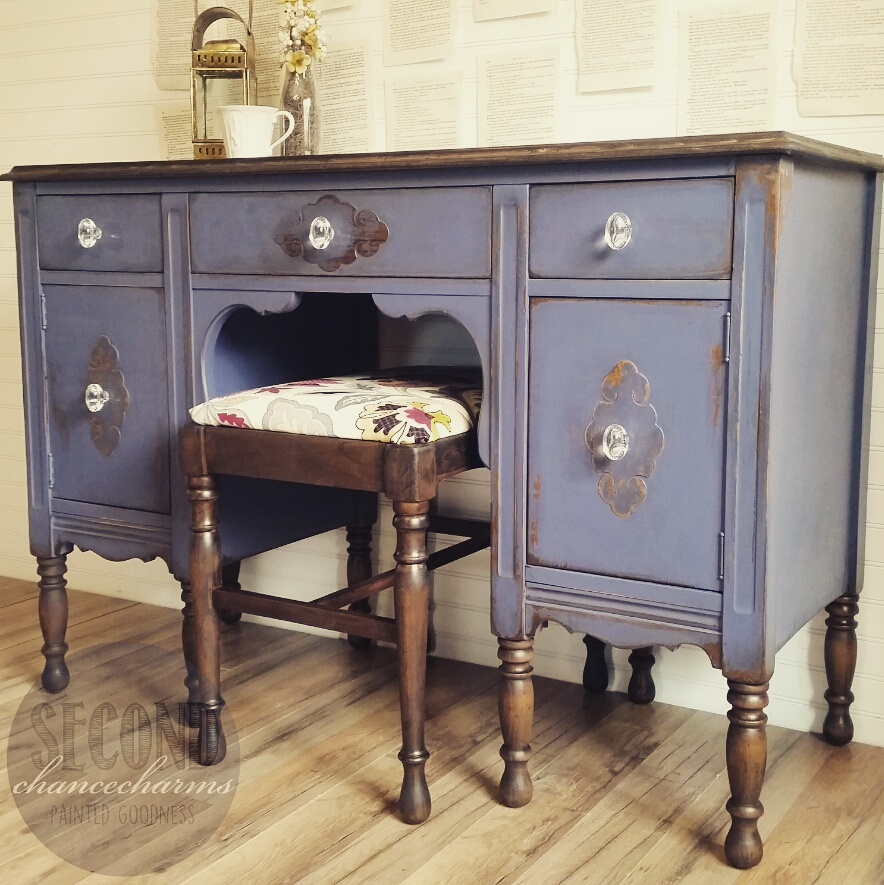
Refinished vintage vanity and stool. Come check out my process on this Second Chance Charm!

Finding great pieces of furniture is a process in itself! It takes a lot of footwork and time. I scored this lovely piece and I fell in love at first sight! She came with her original mirror too (not pictured).
 Like all my pieces, I will post them up under “Customization” first. Meaning, my clients can view my pieces that I have available and choose to purchase them and have them customized to their liking. With this particular piece, she didn’t sit long. I had a client contact me via Facebook in regards to this piece and another piece I had up, a buffet. I went over to her lovely house for a Color Consultation to help her choose the best color for her lighting and talk about what she expected to have. I love doing these consults; I get a prefect idea of my clients style by seeing their home and decor. My client wanted a statement piece. First thing to see when walking in her home. She wanted to go bright and bold with stain and distressing. We sat on her floor in her entry way giggling and getting excited for all the possibilities! Once I had understood her ideas it was time to work!!!
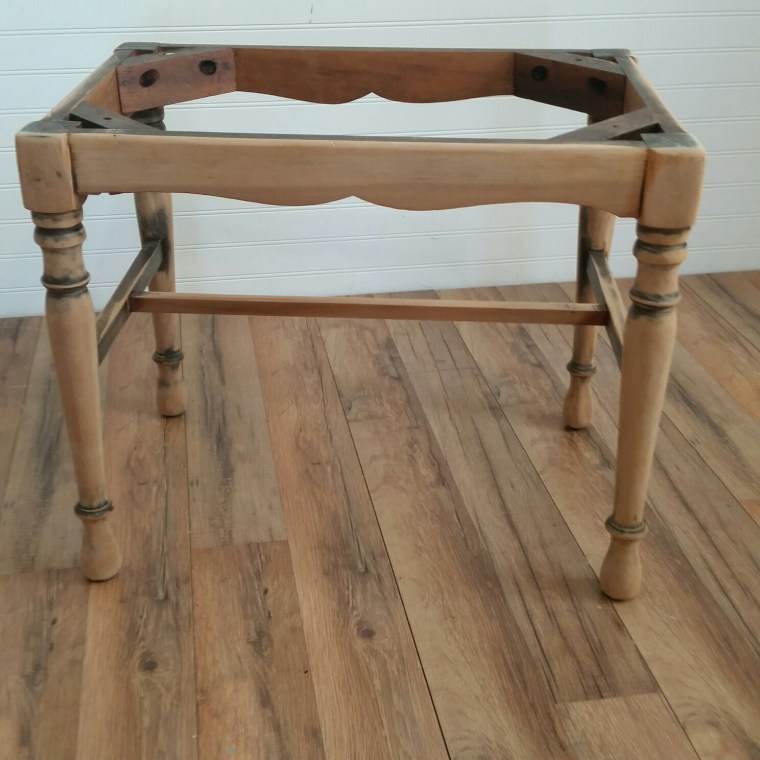
Like all pieces of furniture that are to be refinished, its extremely important to make sure the prep work is done correctly. This process ensures that your paint will cure correctly and last another lifetime as it needs to adhere to your media, whether it be wood, laminate, formica, metal etc.
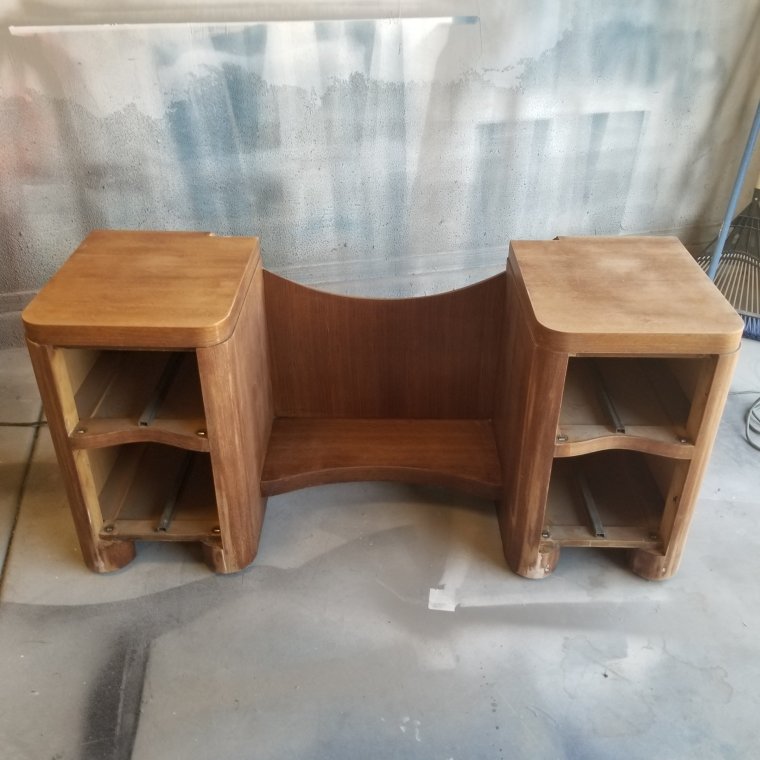
With all pieces that come into my shop, whether it be one I have up for customization or one that a client brought to me, its important to me that I fix all broken parts. Drawer sliders, doors, legs, tops… you name it- it gets fixed to work like the day it did when it was built the first time. Even though this might be a second hand piece, that doesn’t mean it needs to act and look like one- that is the Second Chance way! This vanity had seen better days. Some of her veneer had been lifting and peeling off. (Below is the only picture I have where you can see the veneer lifting up, on the inside of the vanity where the stool would sit. Oh- and there is her original mirror!)
 I went ahead and scraped off all the lose ends of the lifting veneer with a puddy knif and filled that area with Wood Filler. Once the filler had dried, I sanded it down to a smooth surface using 80 grit to a 150 grit sanding paper.

 My client wanted the vanity top and legs to be stained. With my pieces I like to use oil base stain so you can see the real wood grain. It makes the grain look rich in color! I usually start by sanding down the top using 60 grit sandpaper. However, in this case, since the top was a thin sheet of veneer, I used 80 grit and worked my way up to 200 in three stages. You can easily go through veneer and ruin your top, so its important to use light pressure. The reason you want to use multiple sanding sheets is the higher number will get the previous seal and the old stain off. It opens the pores, so to speak. By using a finer grit it helps close the “pores” and makes for a prefect look and smooth feel.
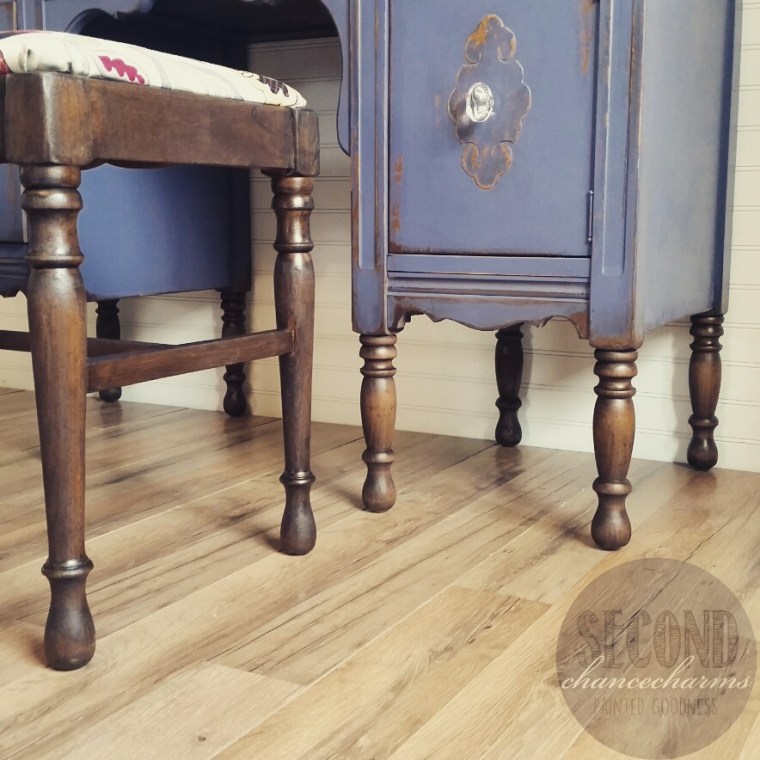
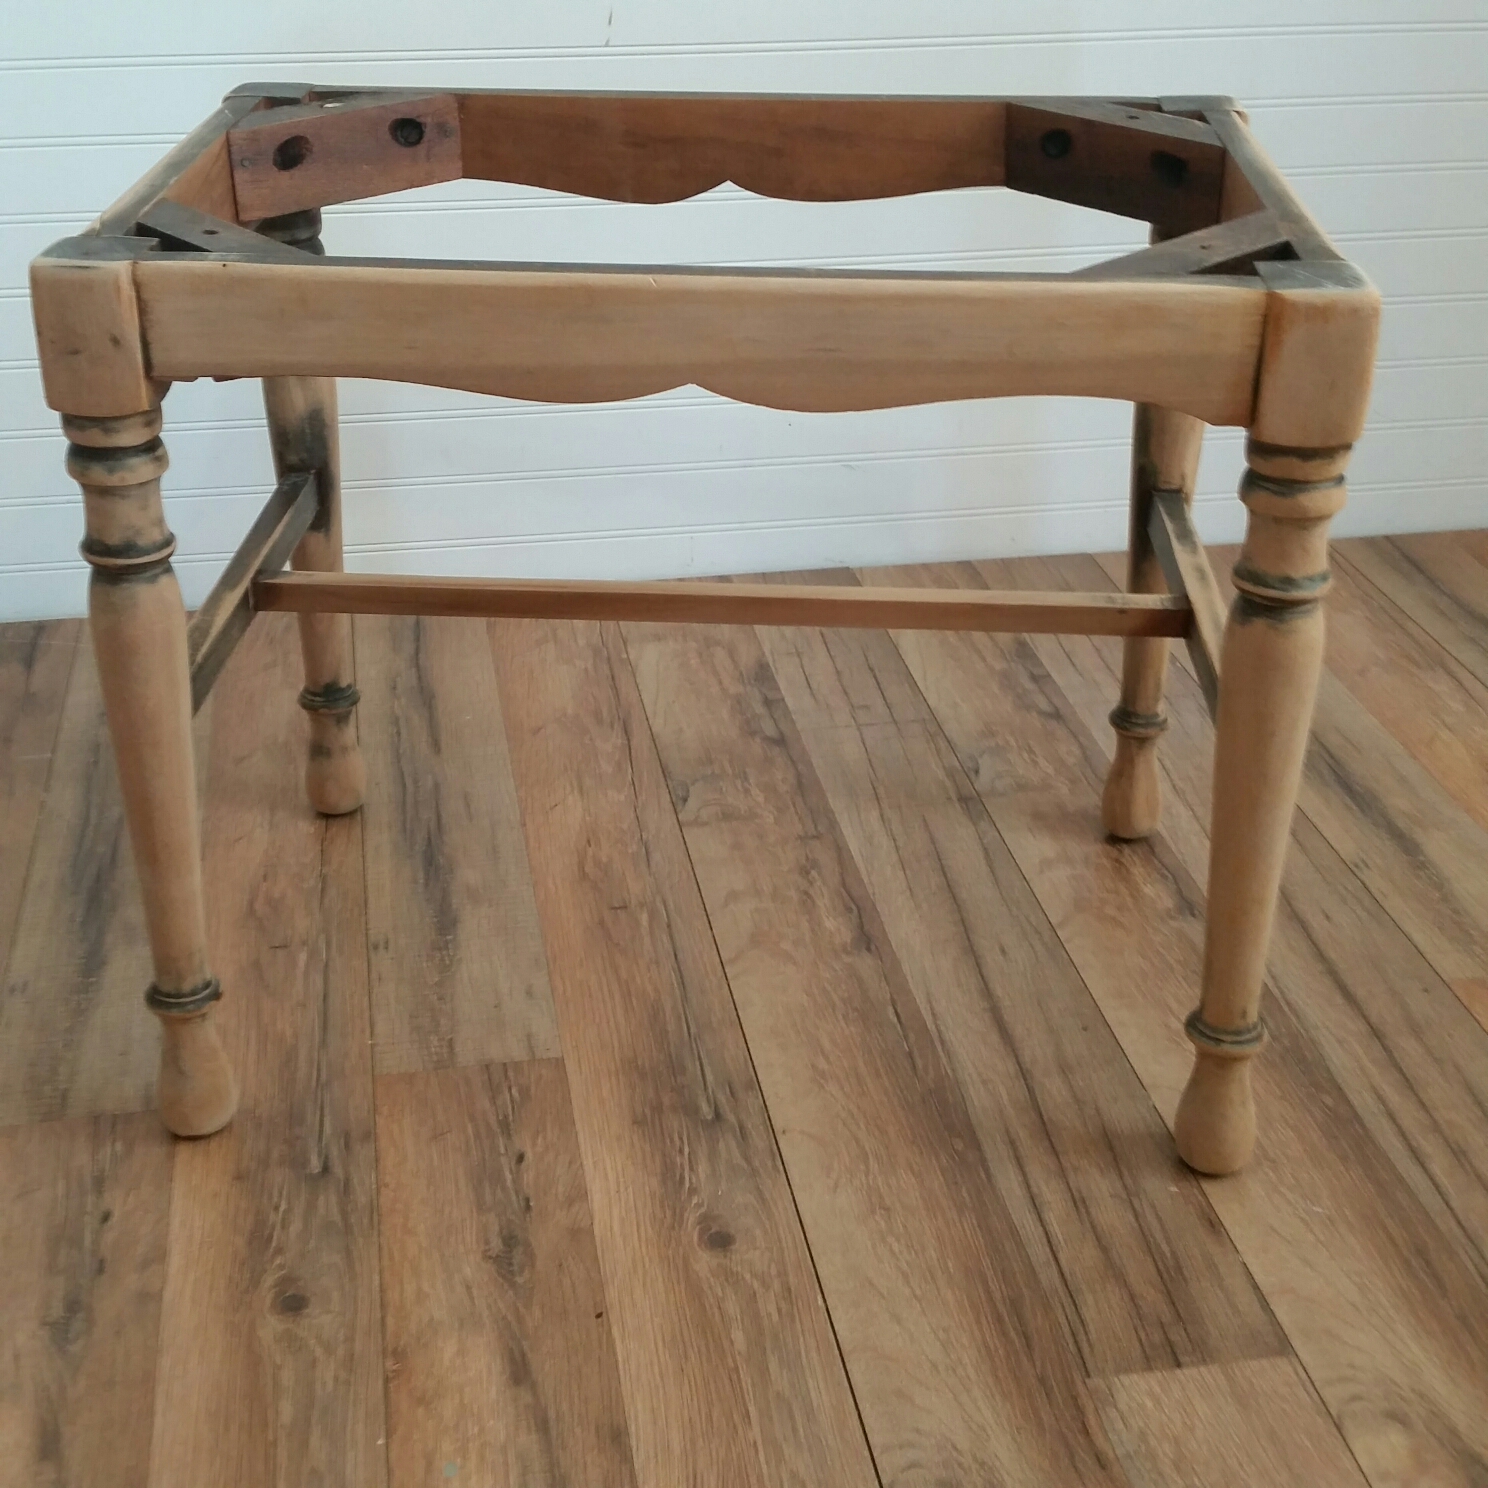
 Once the top was sanded, I started to work on the legs. Because of the curves and design of these beauty’s, I had to sand by hand… On all 12 legs. Those days were a blurr… I used 3M sanding paper which is an amazing product!

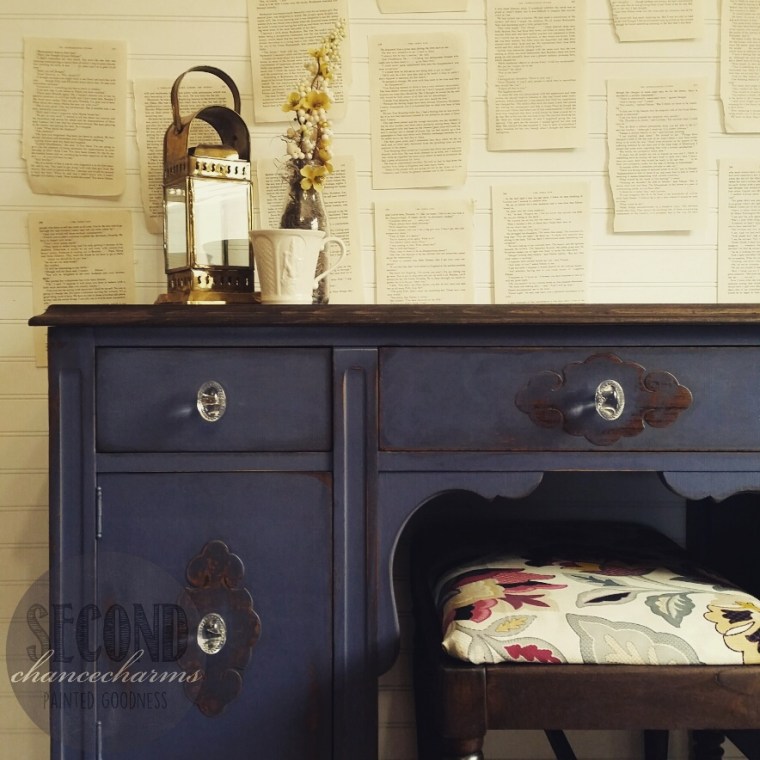
 Depending on what style my client desires, this determines if I need to prime the furniture or not. With distressed pieces, which is in this case, I do not prime. When distressing all layers of paint would show through (more on that later). After the prep work is complete its time for the part everyone loves! PAINT ALL THE THINGS! *yes, I shout this and wave my arms in the air*.My client chose Sherwin-Williams Mineral Gray at our Color Consultation. I adore color and for a statement piece- its perfect!!! I use a commercial sprayer for all my pieces. It gives me an even coat, flawless coverage and a smooth feel. I usually only have to do about 2 coats.
Once my paint had cured its time to distress! Distressing is when you see the wood underneath the paint come through. There are many ways to distressing a piece. In the fine lines, only is areas that have a high traffic touch, all over etc. I have found that all refinishers have their own style, making them their own artist. Perhaps there is no right or wrong way to distressing a piece. If it pertains to your client base and makes you love your style- then that’s all one could ask! I like to have my distressing in the lines and around areas of high use, like the legs and drawers.As a courtesy to my clients I send them progress photos in all the main stages: sanding, priming, painting, detailing and the final reveal. I like to start light in distressing and send them updated pictures. This is the time where they can really start to see their creation come to life. If they want more distressing they can tell me at this point, or tell me- its lovely the way it is. This goes for glazing as well. (more on glazing at another time). My client wanted a light distressing on this piece. The way I distress is using a fine grit like 150 in small little paper pieces sanding off the paint by hand. It takes time, but you have more control and by using a lighter grit sanding paper it doesn’t chew up the paint around the area where you distressed through to the wood. Leaving a total smooth coverage from wood grain to paint. Patience is perfection.
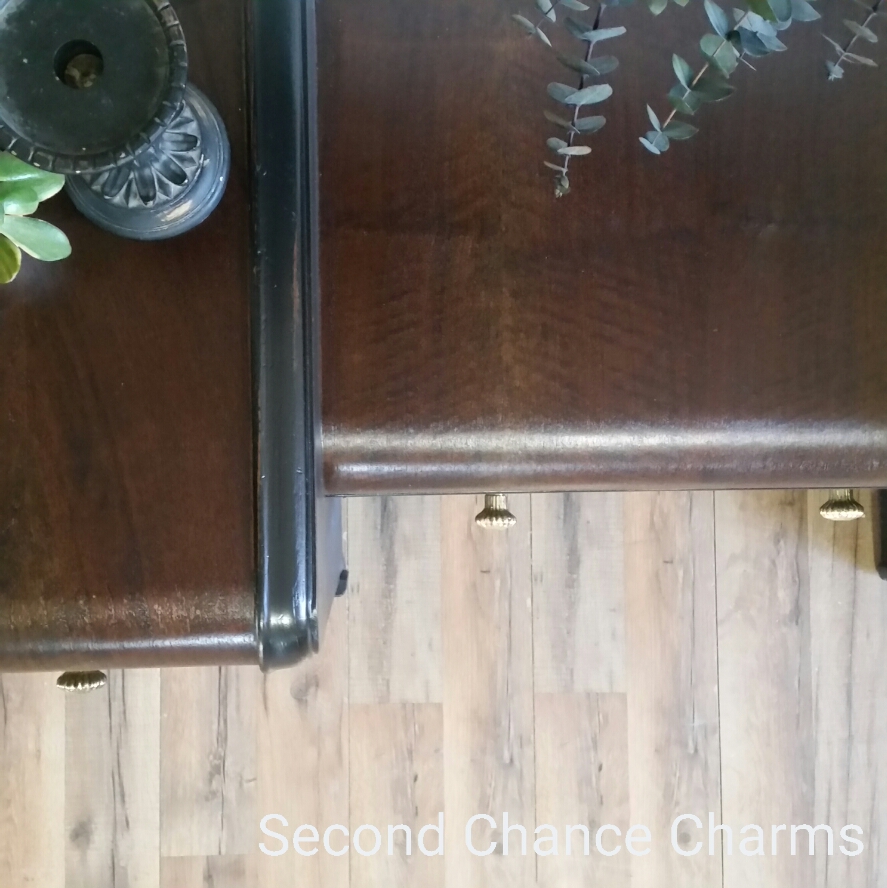
 Time for staining! I remove all my plastic that is protecting the stained areas. I love to use Minwax oil based stain. On this piece, my client chose Dark Oak stain. I started with the legs first. First, I gave another wipe down on each leg to free of any debris and used a sponge brush to make sure I get in all the grooves on the legs with stain.
Once the stain has been fully applied on the area I waited about 3 minutes, the longer you wait, the darker the stain will become from soaking into the wood. With this piece I didnt want it too dark, you can always add more coats for a darker color, so starting light is smart. I used a rag to remove any access stain.

 Once all my legs were stained I moved to the top of the piece. Using the same technique; a wipe down using a clean rag, stained using a foam brush, allowing time for soaking in and then using a clean rag to wipe off extra stain. (Note: its really important to keep stirring your stain can to keep from the color separating.)

 Let your freshly stained areas cure for at least 8 hours. Then you can seal the stain with polyurethane.
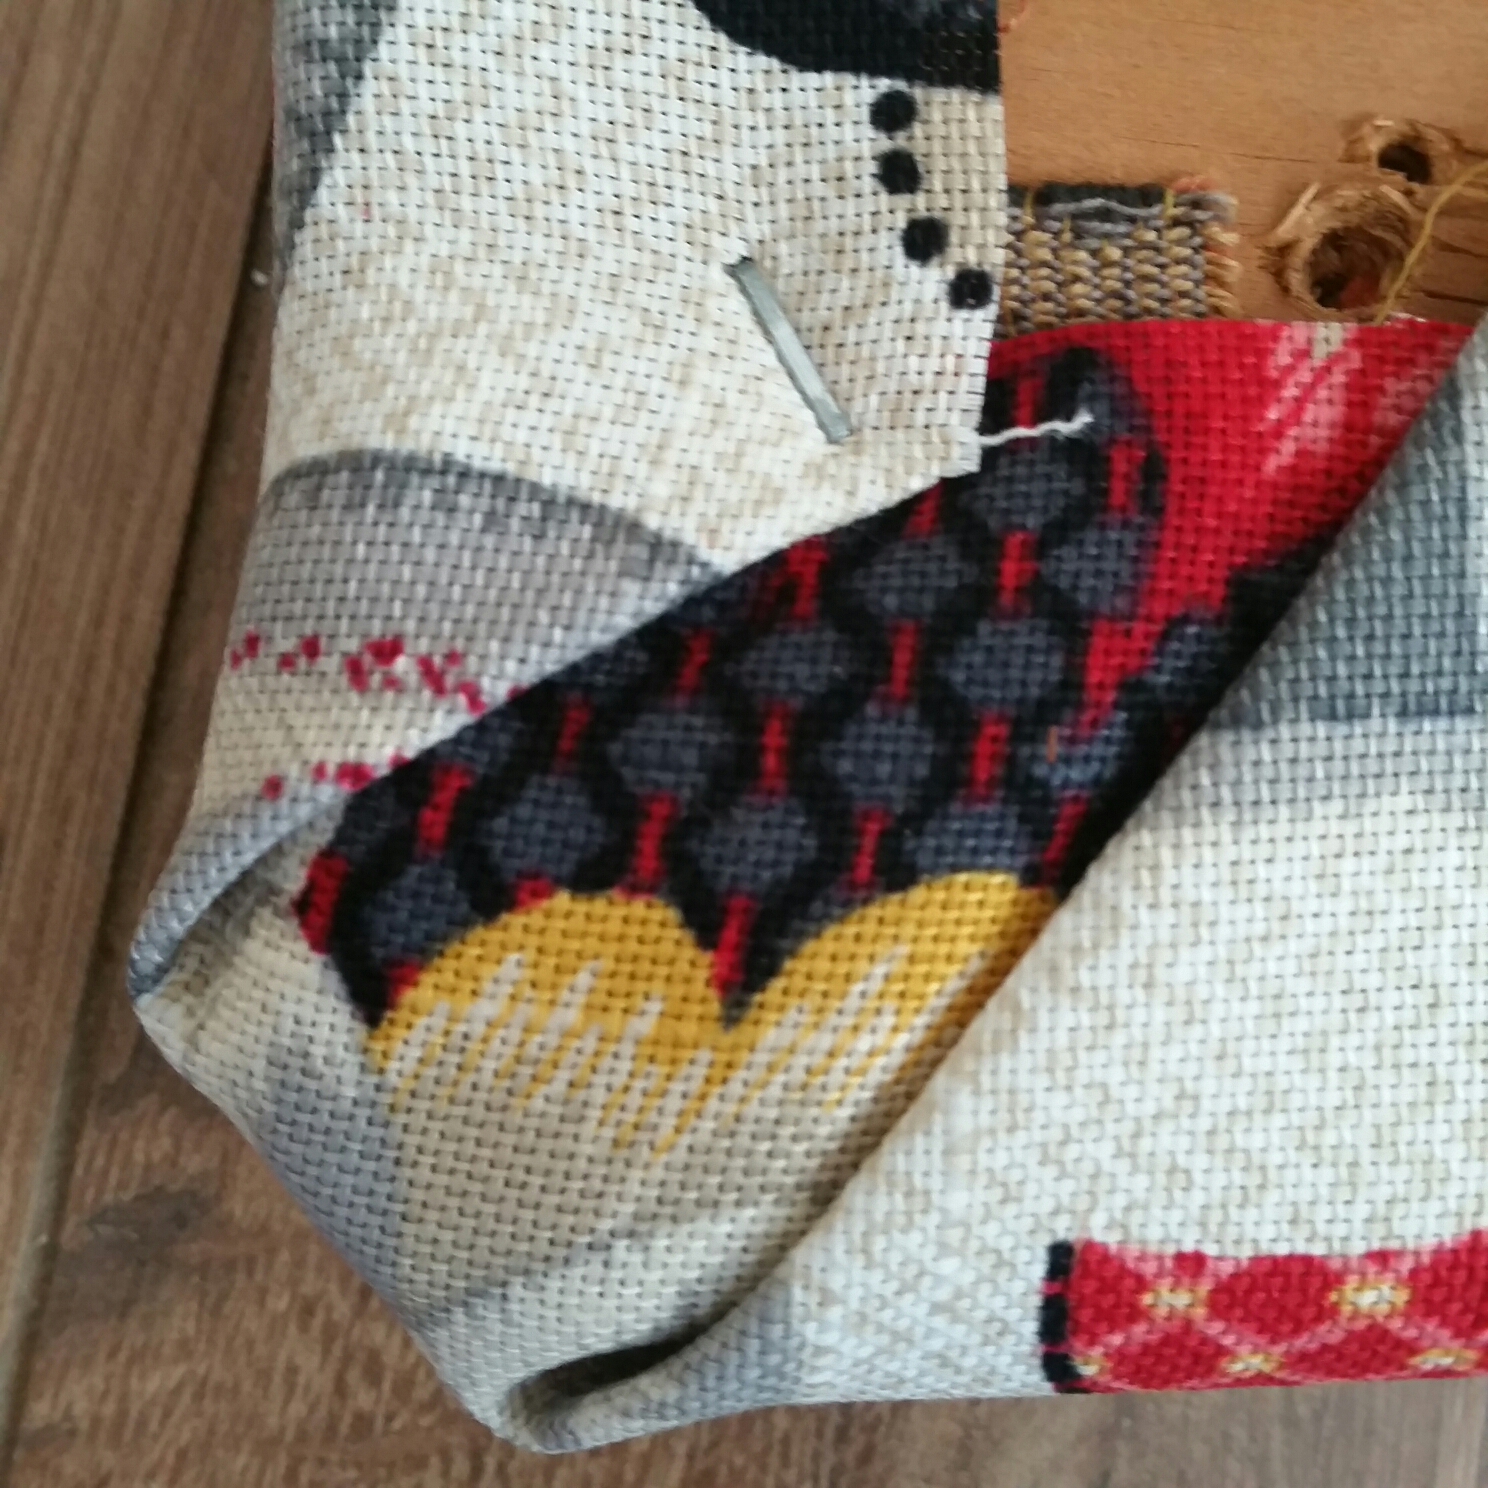
I reupholstered the stool with upholstery fabric my client found from Joann’s Fabric Store. We also had enough left over that I went ahead a used it as drawer liner. I used Krylon High Strength spray adhesive in the drawers to attach the fabric as liner.
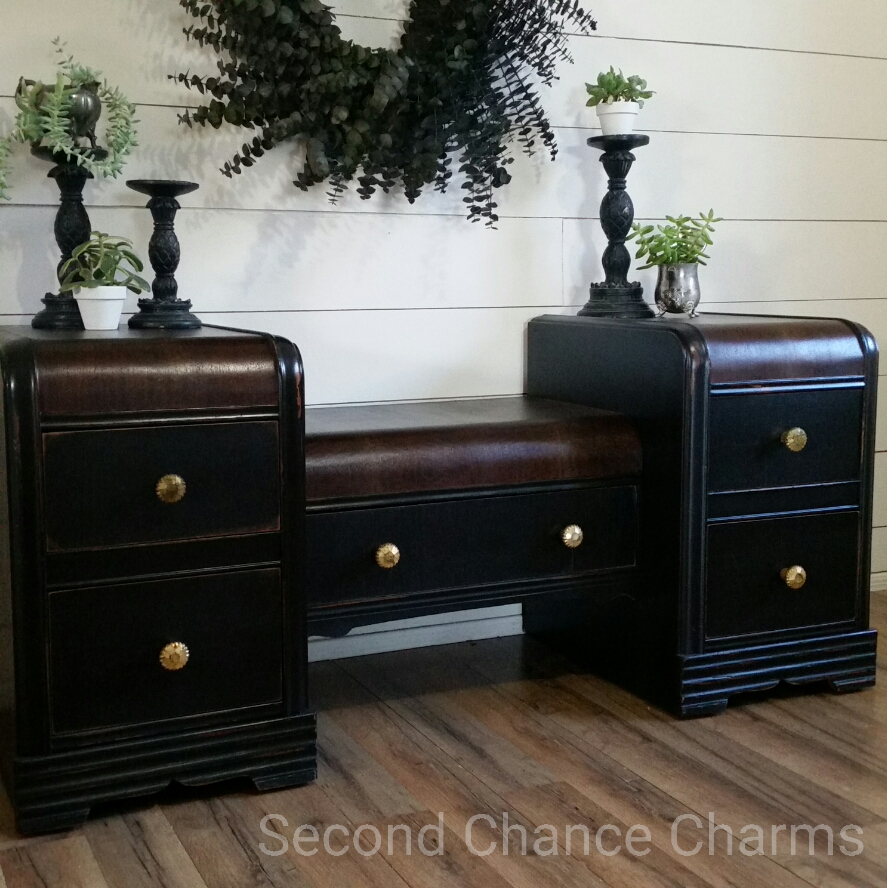
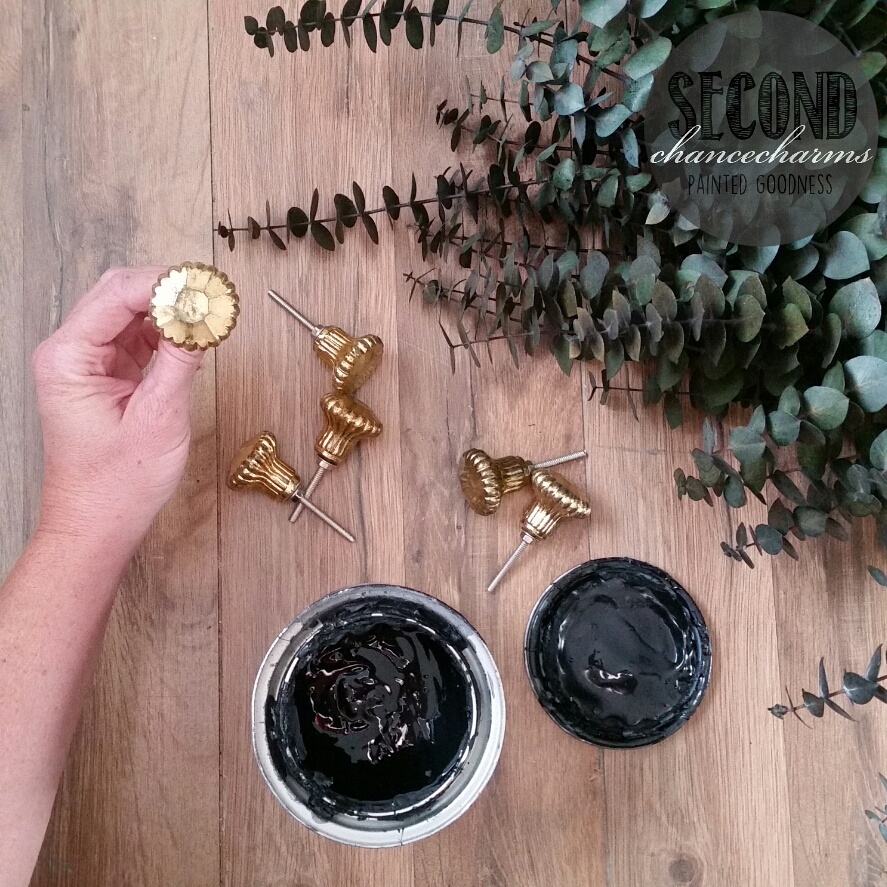
 The most rewarding part of all this work is installing the hardware and taking a step back to see the final piece, in all her glory come together .
My client had chose these gorgeous crystal knobs for her vanity along with this fabric for the stool.
 What do you think of the final piece!!? I am in love!