Most recent projects! Rocking chair available for purchase! I am finding my groove with the new summer schedule and have lots of goodies to share with you this up coming week, one that will be available for purchase!

Most recent projects! Rocking chair available for purchase! I am finding my groove with the new summer schedule and have lots of goodies to share with you this up coming week, one that will be available for purchase!
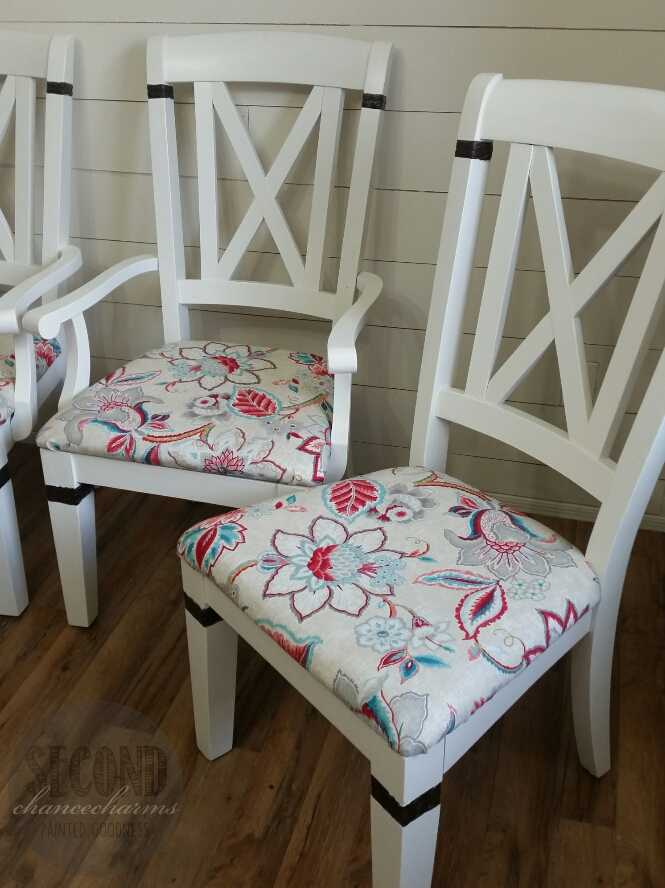
Shopping around for new dining table sets doesn’t take long to realize how expensive a table and chairs can add up. When you have a piece at home that doesn’t quite match your decor but you love the style, sturdiness and memories your piece brings it only makes sense to have it refinished. My client found herself in this same situation.
I met my client at her home and gave her a color consultation using her lighting and we talked about options for this piece. Her dining table and chairs have leather details, a gorgeous slate top on the table and a sturdiness unlike anything I have ever dealt with. (I am not kidding this thing, is ridiculously heavy and should be banned haha)
She and her husband settled on a solid finish in Sherwin-Williams Greek Villa for both the table and chairs. I re-upholstered the chair cushions in a gorgeous upholstery fabric my client picked out from Jo-Ann Fabric and Crafts store. I can’t wait to see what this fellow looks like in his home!


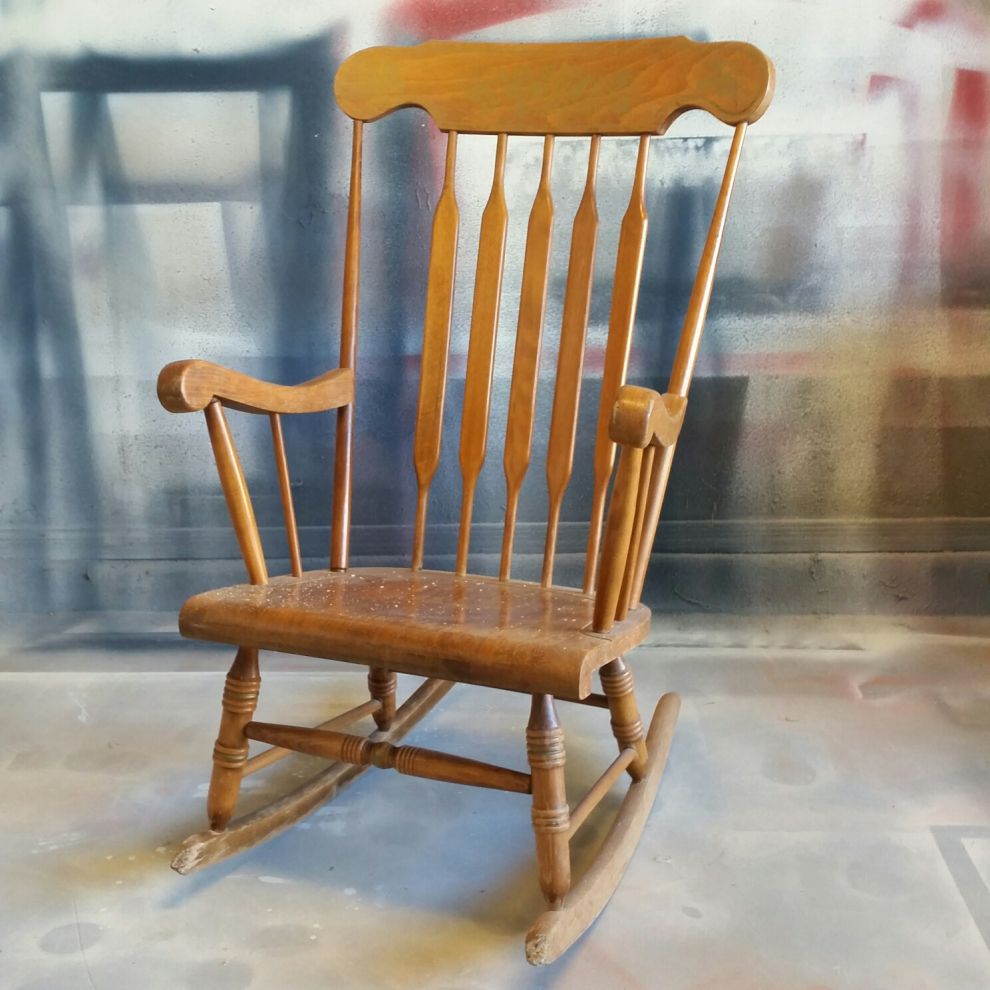
Before picture:

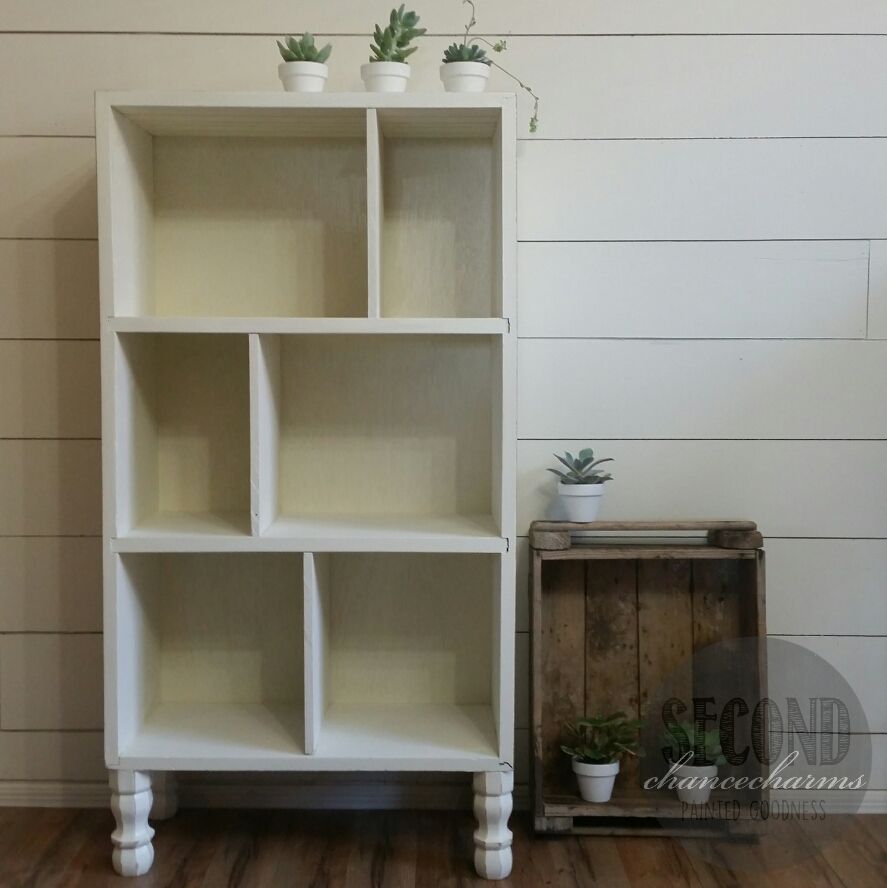
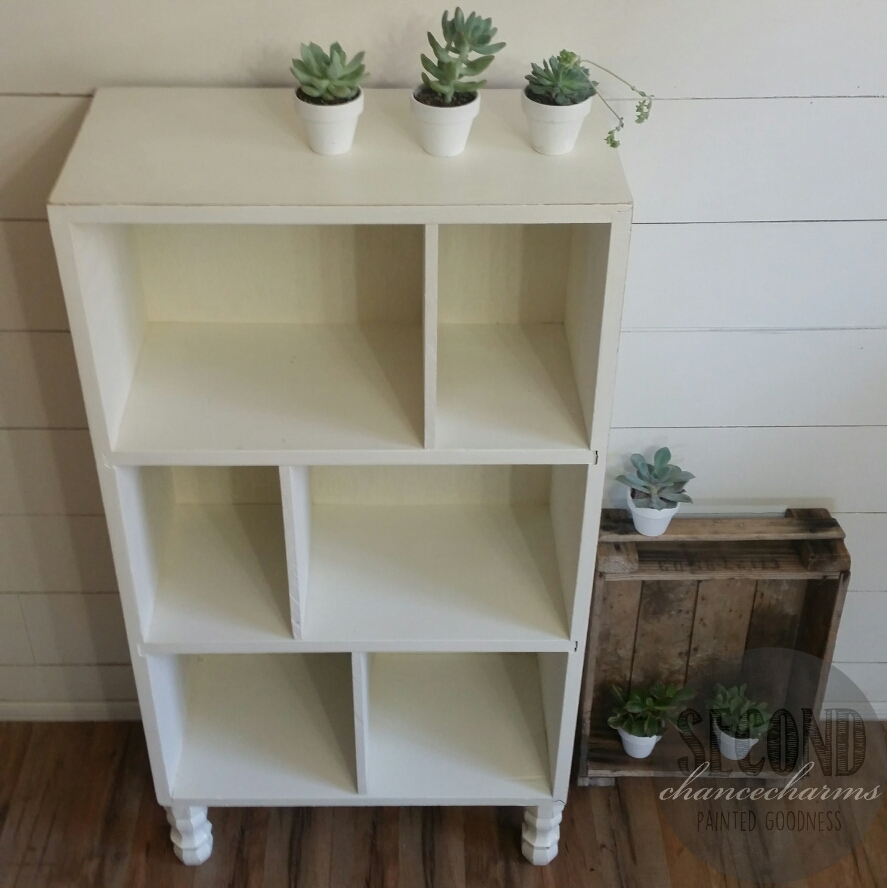
Make your own vintage doll house! Bookshelf + Legs + Paint/Paper = Doll House!
I found a small wooden bookshelf at a garage sale for $5 bucks. My client picked out small little legs from Home-depot to give this little piece flair. I added a few wall dividers and added paint. My client wants to add wall paper and little furniture so her grand-daughter can play with her dolls.


Refinished in Sherwin-Williams Dover White and slightly distressed.


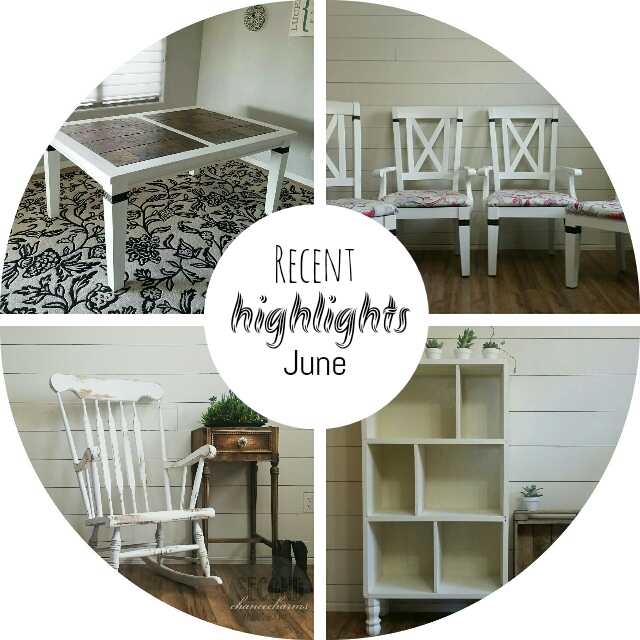
School studies have officially come to an end and summer is just beginning! I know I am NOT alone when I say “Thank Goodness May is over!” May happened to be one of the busier months for my family this year. We had birthdays, out of town family visiting, graduations, faith ceremonies and an emtional goodbye to part of our family moving out of state. I am glad May is over. Lets take a look at what has been completed this month as one of my smallest group of refinished furniture by far, but all gorgeous none-the-less.
 This month I wrote a blog post about Secrets, Tips & Tricks on a master bedroom overhaul that was completed. I shared with you products that I use and the process on how I do my furniture so that you can try it on your pieces at home. As always, if you rather have me do all the work (which I most certainly don’t mind) please email, text or call me for a quote! Remember to get yourself on the First Dibs Email to be notified first on available pieces.


This month I received many customer photos of Second Chance pieces staged in their homes and I am completely swooning over them! Some pieces you may recognize, one that was my first piece of January of this year and another from December 2015!


When I stand before God at the end of my life, I would hope that I would not have a single bit of talent left and could say, I used everything you gave me.
-Erma Bombeck
The 2016-2017 school year has ended and I am enthusiastic to finally share with you something that I started back in November of last year. If you recall my New Years resolution for 2017 was Inspiration; you can read about it on the 2016 Portfolio post.
Little back story:
We are days away from ending the first quarter of school and my first grader, Donovan, loads in the truck at Drive Line with an expression that literally looked like a light bulb went off in his head holding a sheet of paper in his hand.
D- “Mom, after school clubs came out for 2nd quarter I want to do one!”
Me- “That sounds amazing, which one?”
D- “Well that’s the thing, they don’t have THE ONE I want to do, will you run it with me?”
Art Club
What I wonderful idea my son had to host an after school Art Club for his peers! As the year was coming to an end I was Soul Searching what it was I wanted to work on for myself in 2017. Donovan inspired me to get out of my comfort zone. I am NOT a teacher by any means. I was nervous, sick and excited all at the same time about sharing my passion with children. Lets be honest children can be VERY candid. I was frightened. I kept reminding myself that talking in front of a group of adolescence might be less nerve-racking than lets say a group of adults. Public speaking is not my forte.
My first art club started off with 22 children ranging from Kinder to 6th grade. By the end of the school year we had a total of 48 kids split into 3 different age group classes.
“I went into this hoping to inspire children about the creativity of art and passion… but it was I who became inspired by them.”
– Rebecca Whitney


“Understand that you can be an inspiration to others, no matter what you feel you have or have not achieved. Even if you feel that you have not yet reached the endpoint, and even if you feel like you have reached a low point, you have the ability to inspire. No matter who you are, giving back and inspiring others comes equipped with many benefits. You never know who you’re going to impact when you give — and you never know who might be in position to reciprocate if you ever find yourself in a time of need. Giving back leaves a legacy that will live on far longer than you will. You will be amazed at the way inspiring others makes you feel. In fact, it is the only feeling that rivals the one you get when you realize you have achieved your dream.” -R. Kay Green
By the end of each class, and as each child focused on their projects, you could faintly hear a steady humming sound coming from each of them. An Artist ‘In The Zone’ moment. We did many creative art projects. As I would bring my samples into class to share with them what we would be working on, I became enriched with their ooh’s and aah’s. I encouraged the “Can I make mine different than yours?”. Never ONCE did any of my artist undermine another artist for his or her project. Those tiny artist taught me so much this school year.
xoxo -Rebecca
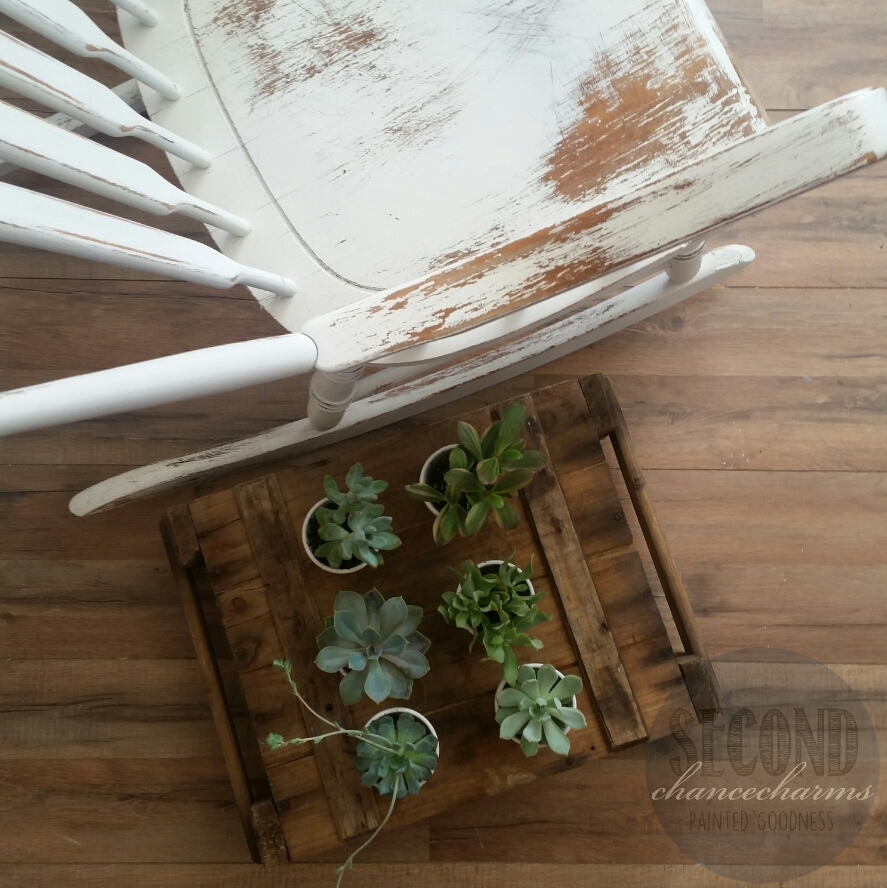
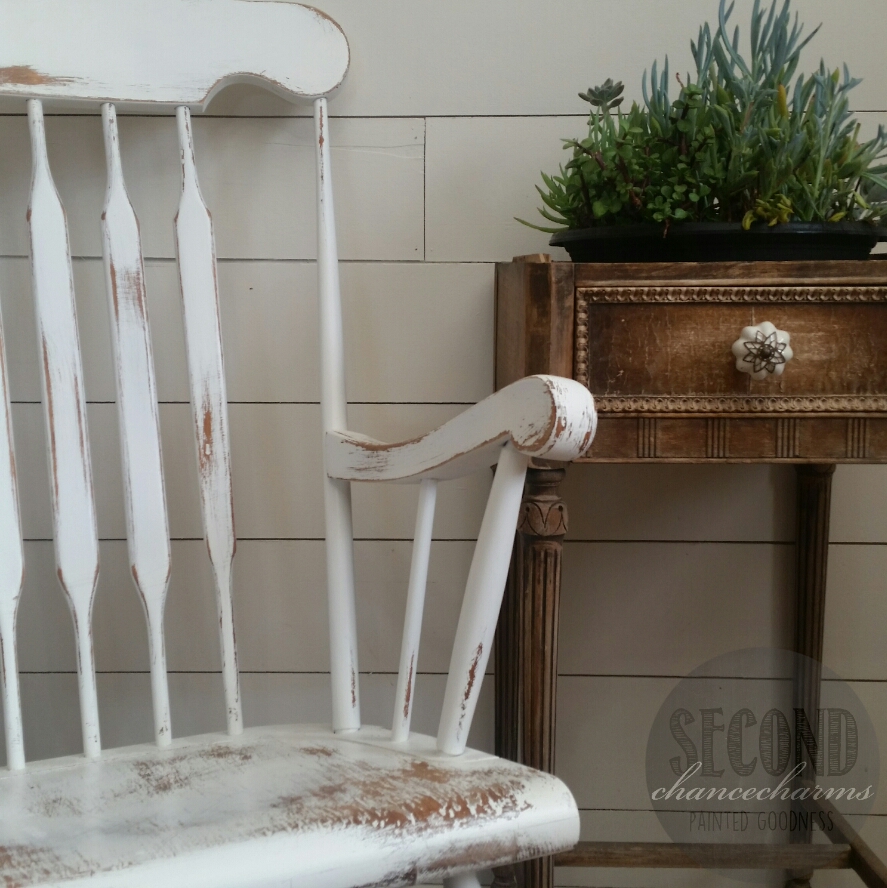
Lovely antique rocking chair perfect for any room or simply sprucing up your front porch! For sale, click over to Shop Selections for details.
Refinished in Sherwin-Williams Greek Villa and chippy distressed for that perfect farmhouse look.


I can’t believe how fast this 2016-2017 school year has gone by!!!

I remember writing my blog post First Day Of School 2016! like it was yesterday. I am so proud to share with you that we now have a 4th grader and 2nd grader and a Preschooler for the 2017-2018 school year! Eeep!!

What an emotional morning! This is the first year where my kids are sad to have school come to an end. However, we are looking forward to summer and our summer plans!! What is in store for your family this summer?
Last year on Back to School 2016!! I built our work station over the summer which was completely helpful for this school years homework. This summer I have plans on making our laundry room a bit more organized for a nice steady flow.
As always thank you for your continued support and patience as my family and I find a new routine for this summer’s schedule.

I get many questions on the “How To’s” of things; what products I use and the process I do to complete my pieces. Back in August of 2016, I shared with you how I refinished the Vintage Vanity and Stool Tutorial. Today I will share with you what steps I took to complete this farmhouse chic master suite bedroom set.
Client Photos:


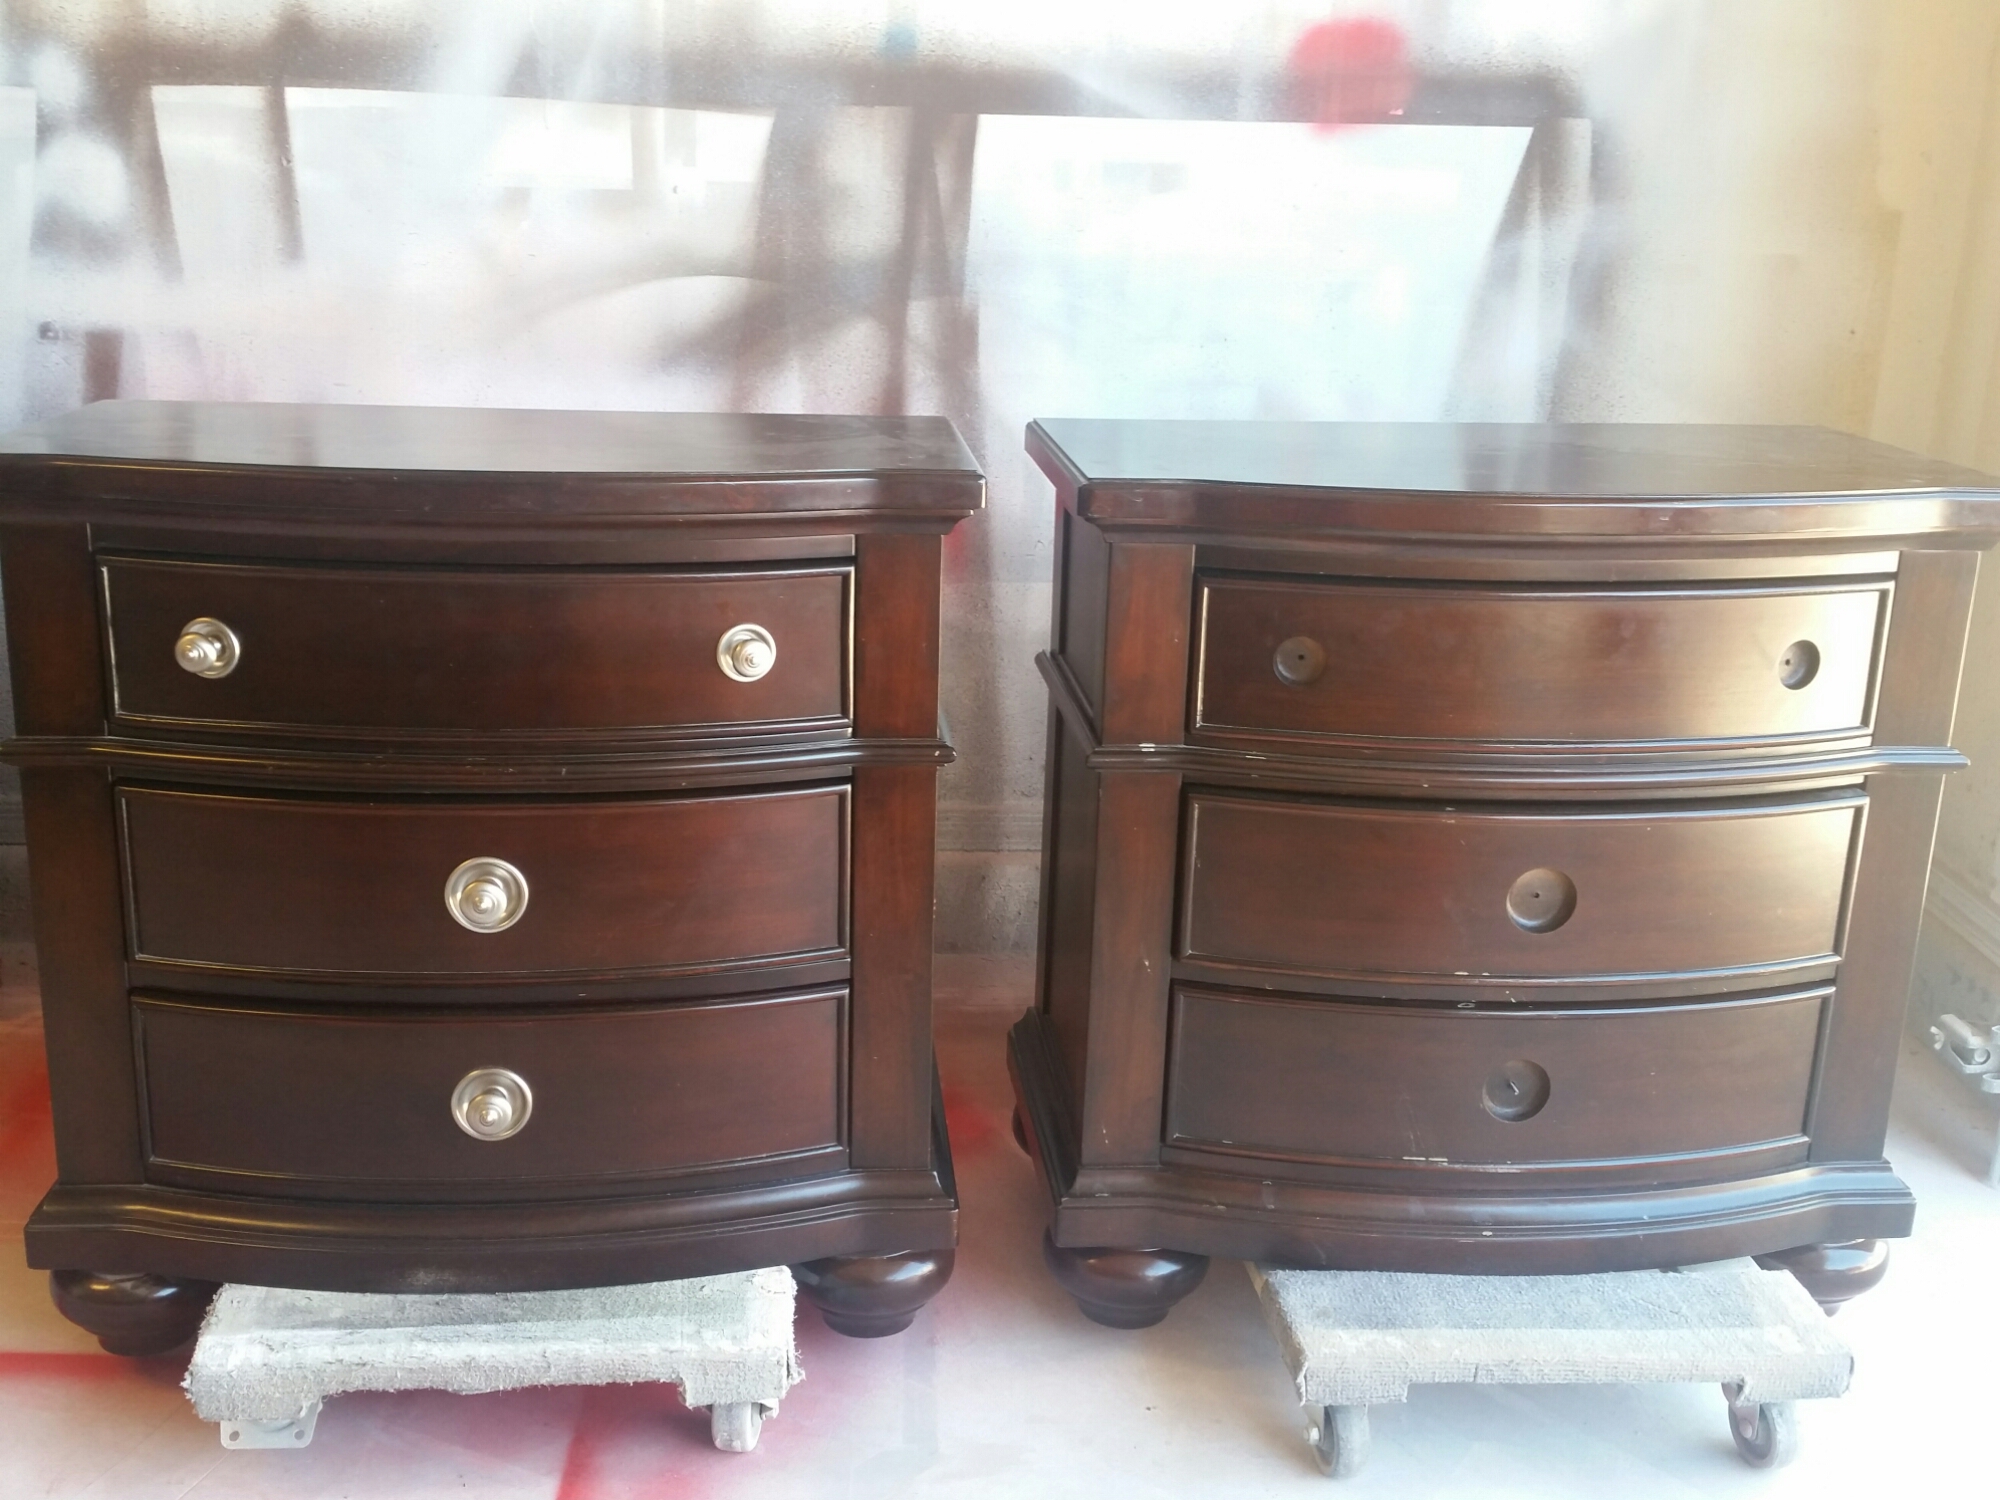
Before pictures of the 8 Drawer Dresser, 2 Nightstands and a King Sleigh Bed frame.
Starting any project, I remove all hardware first. It may be the easiest step consisting in using a Phillipshead or Flathead screw driver, but that is not why I enjoy it. This is the time where I get a feel for the piece that I am working on. I learn where the scratches are that may need to be filled. Or take note on which drawer slider is broken or missing. If I am working on a piece of furniture that I will put up for sale in Shop Selections, this is the time where my vision usually starts to happen for that particular item. I become one with my blank canvas. Don’t make fun! I am getting personal here. It’s few and far between where I will see pieces that I purchase during my treasure hunts and KNOW exactly what needs to be done to bring him or her a Second Chance in that moment. Such as these pieces: Dresser turned Media Console, Navy End Table, Baby Changer and Antique Dresser with Mirror.


I swear I could hear “pick me, pick me”- make me into *BAM* the vision hits.
After removing the existing knobs to the sleek traditional bedroom set my clients piece was left with huge holes where the knobs came from that we of course didn’t want. Plus the placement wasn’t going to work anymore for the knobs and pulls my client had picked out. I filled those holes in with Bondo.

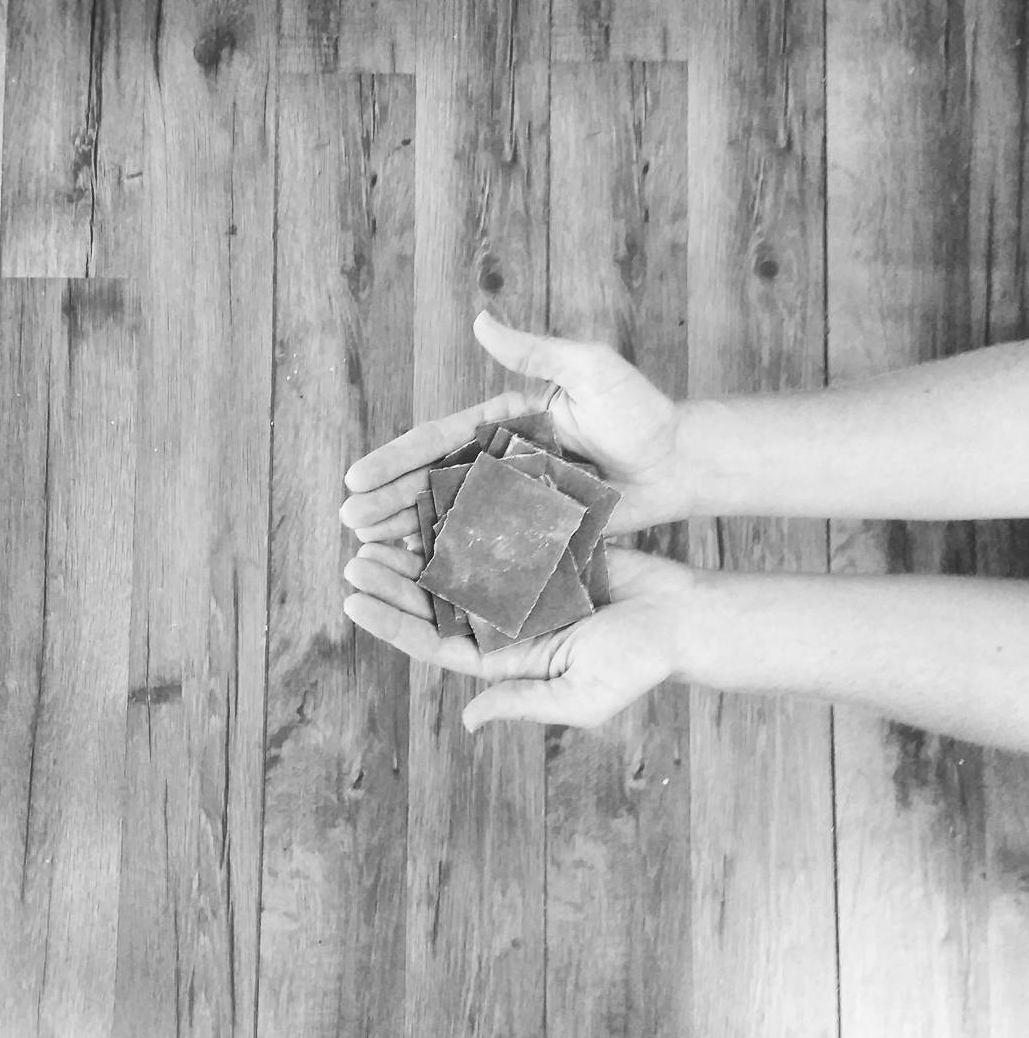
Believe it or not, I love using Body Filler for cars bondo. Crazy right!? This stuff sticks, drys fast and sands down great for a smooth even finish. Of course use a high grit sanding paper like 80 grit at first and work your way down for a soft finish using 150 grit. I continued the sanding on the entire piece to remove chips, gauges and scratches. A light sanding is perfect- you don’t need to get down to bare wood (unless you were staining.)

Once the sanding has been completed I clean my furniture pieces with TSP. A heavy-duty cleaner that will help remove any gunk, grim and the shine! This will help ensure that your distress finish stays and lasts for many generations. I use this on ALL my pieces! Even the solid and glazed finishes.

Once completely dry its time for paint!!! The fun part right!? I use a paint sprayer for my pieces. I have gone through a handful of different types and enjoyed them all in their different ways. I can say I am a Graco Girl, I love the even smooth finish a commercial paint sprayer leaves behind.

I also use Sherwin- Williams Paints made for furniture. I have used their brands such as Solo, Snapdry and Proclassic. I must say Proclassic is my favorite and what I use most often, unless the color tint chosen by myself or my client permits it; such as using dark colors. The paints I use are made for cabinetry, doors and baseboards; high traffic areas that will need to be able to withstand sticky little fingers, excessive cleaning and the daily normal use life gives.
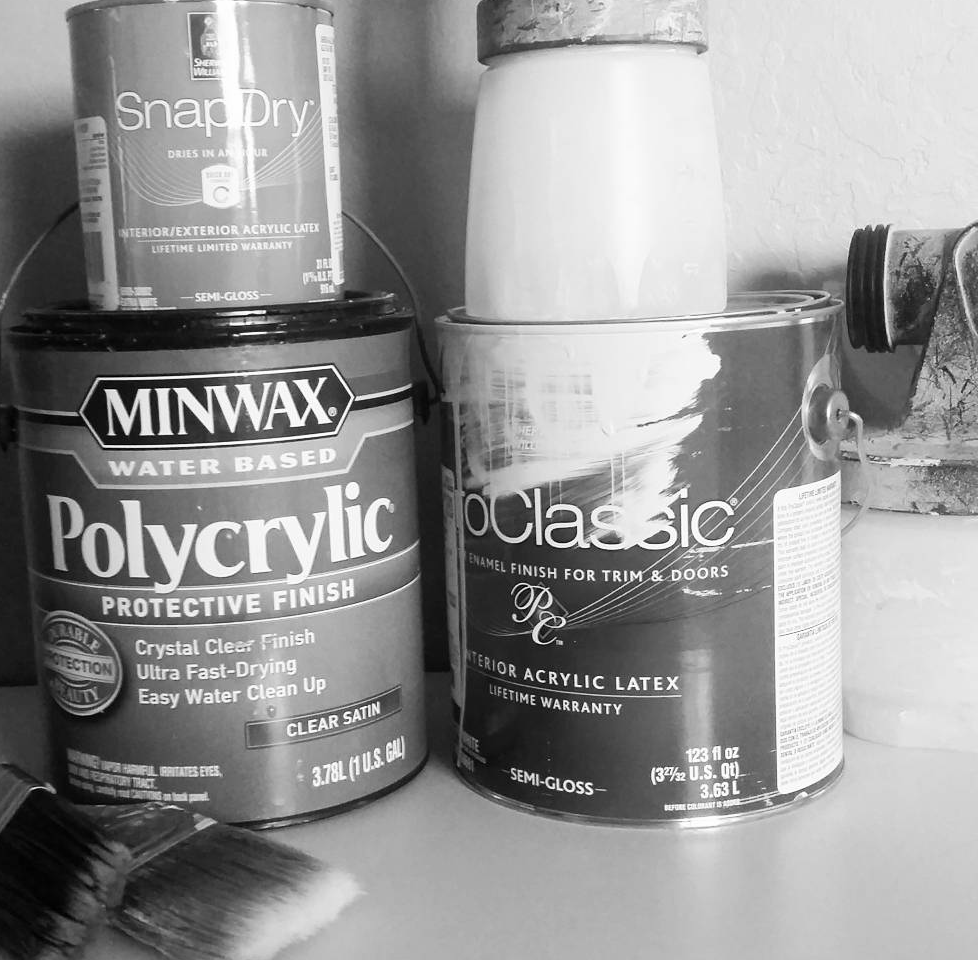
There is no annual waxing that would need to be done; other paints on the market need to have certain types of up keep to maintain its protection. The paints I use have a sealant, if you will, in them. There is no need to seal them with a polyurethane, however you can. Make sure to use a water base polyurethane- this will keep from turning yellow over time like what an oil-base product would do.
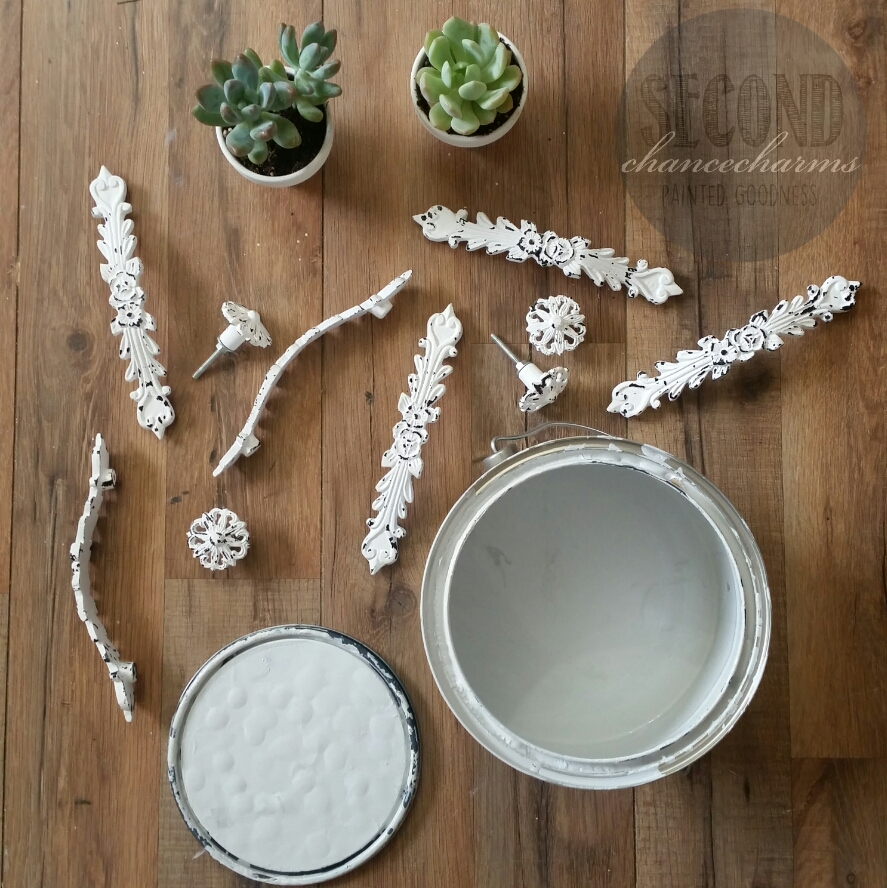
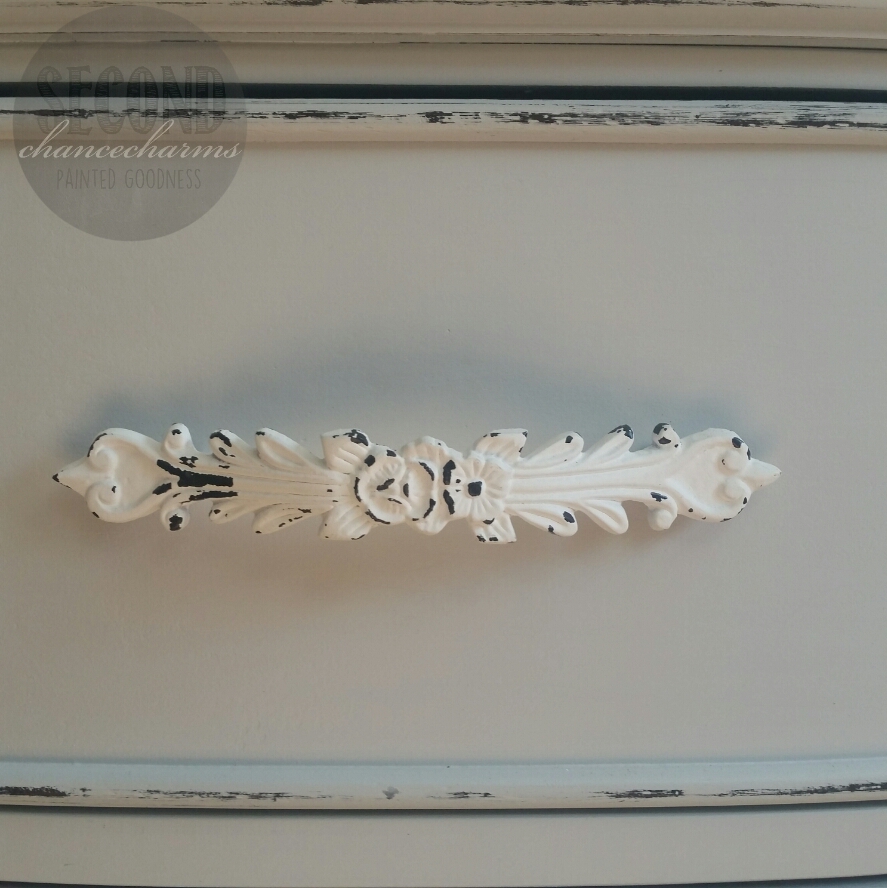
My client chose Sherwin-Williams Reflection for her bedroom set. She also picked out these adorable knobs and handle pulls that I seriously can’t get enough of from Hobby Lobby!


Most times I will use the existing hardware on pieces and revamped them in a color because it is a heck of a lot cheaper and can create a new look. You could also polish them and bring the hardware back to its original state, which I have done in the past like on these pieces:


Lighting creates color. I have about 10 paint books that are consistently coming and going for my clients. I encourage them to look at the color they want during all times of the day. As light shifts, both natural and artificial, the color will change its appearance. Its basically like this: Light creates color, without light we would have darkness. Hens your white to black hues. I do offer Color Consultations where I come to your home and help you pick the best color for your lighting.


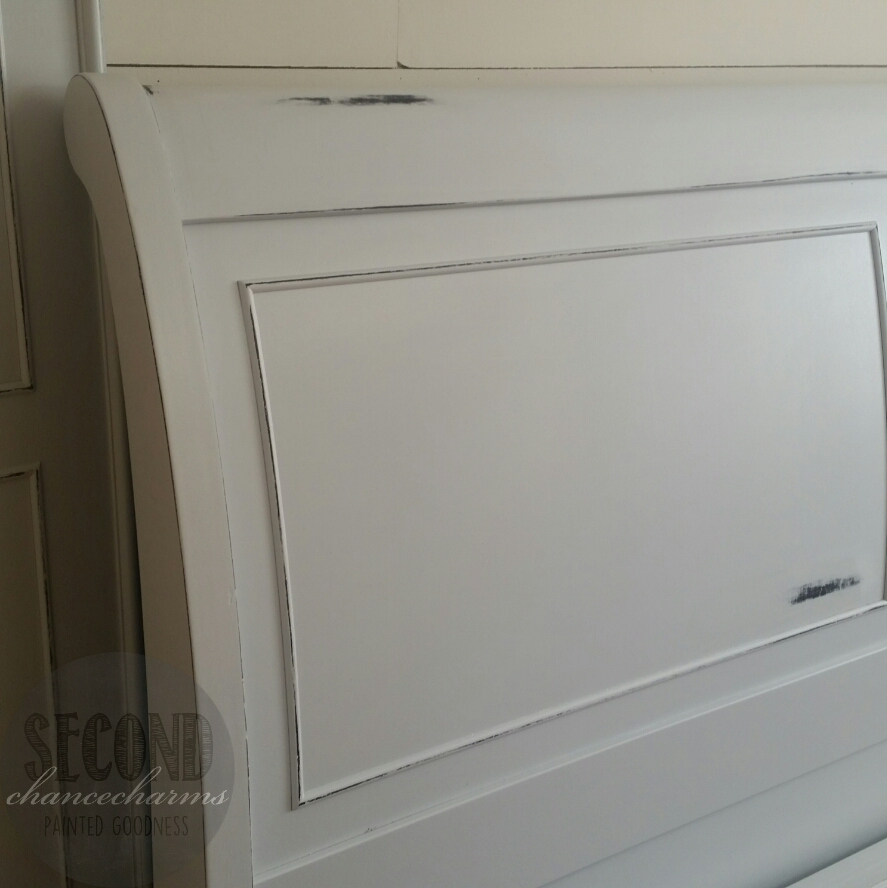
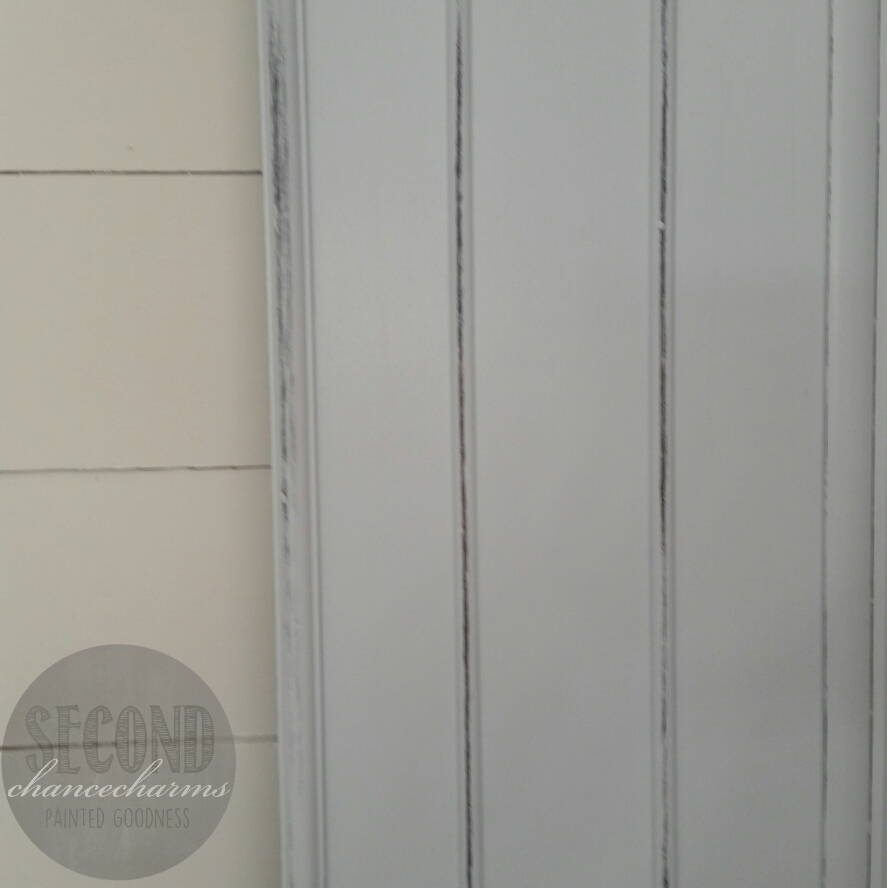
When the paint has completely dried I distressed the pieces. I use a 150 grit sanding paper. I like to use little small pieces and distress in the lines and on certain areas, making sure it doesn’t look “cow-like” as I like to call it. I don’t like the uniformed spotty look. There are many ways to distressing furniture, and I have seen many different styles, I am just sharing with you what I like to do and what I think looks gorgeous.
Once I am happy with my distressing I measured and drill my holes for the knobs and pulls. Once all hardware is in place I step back and my heart- yet again- drops.
I love what I do! I hope you enjoyed this blog post, leave me your comments and questions down below. Tell me what Secrets, Tips and Tricks you would like to see next, perhaps Glazing?
xoxox
Rebecca
Most recent projects!

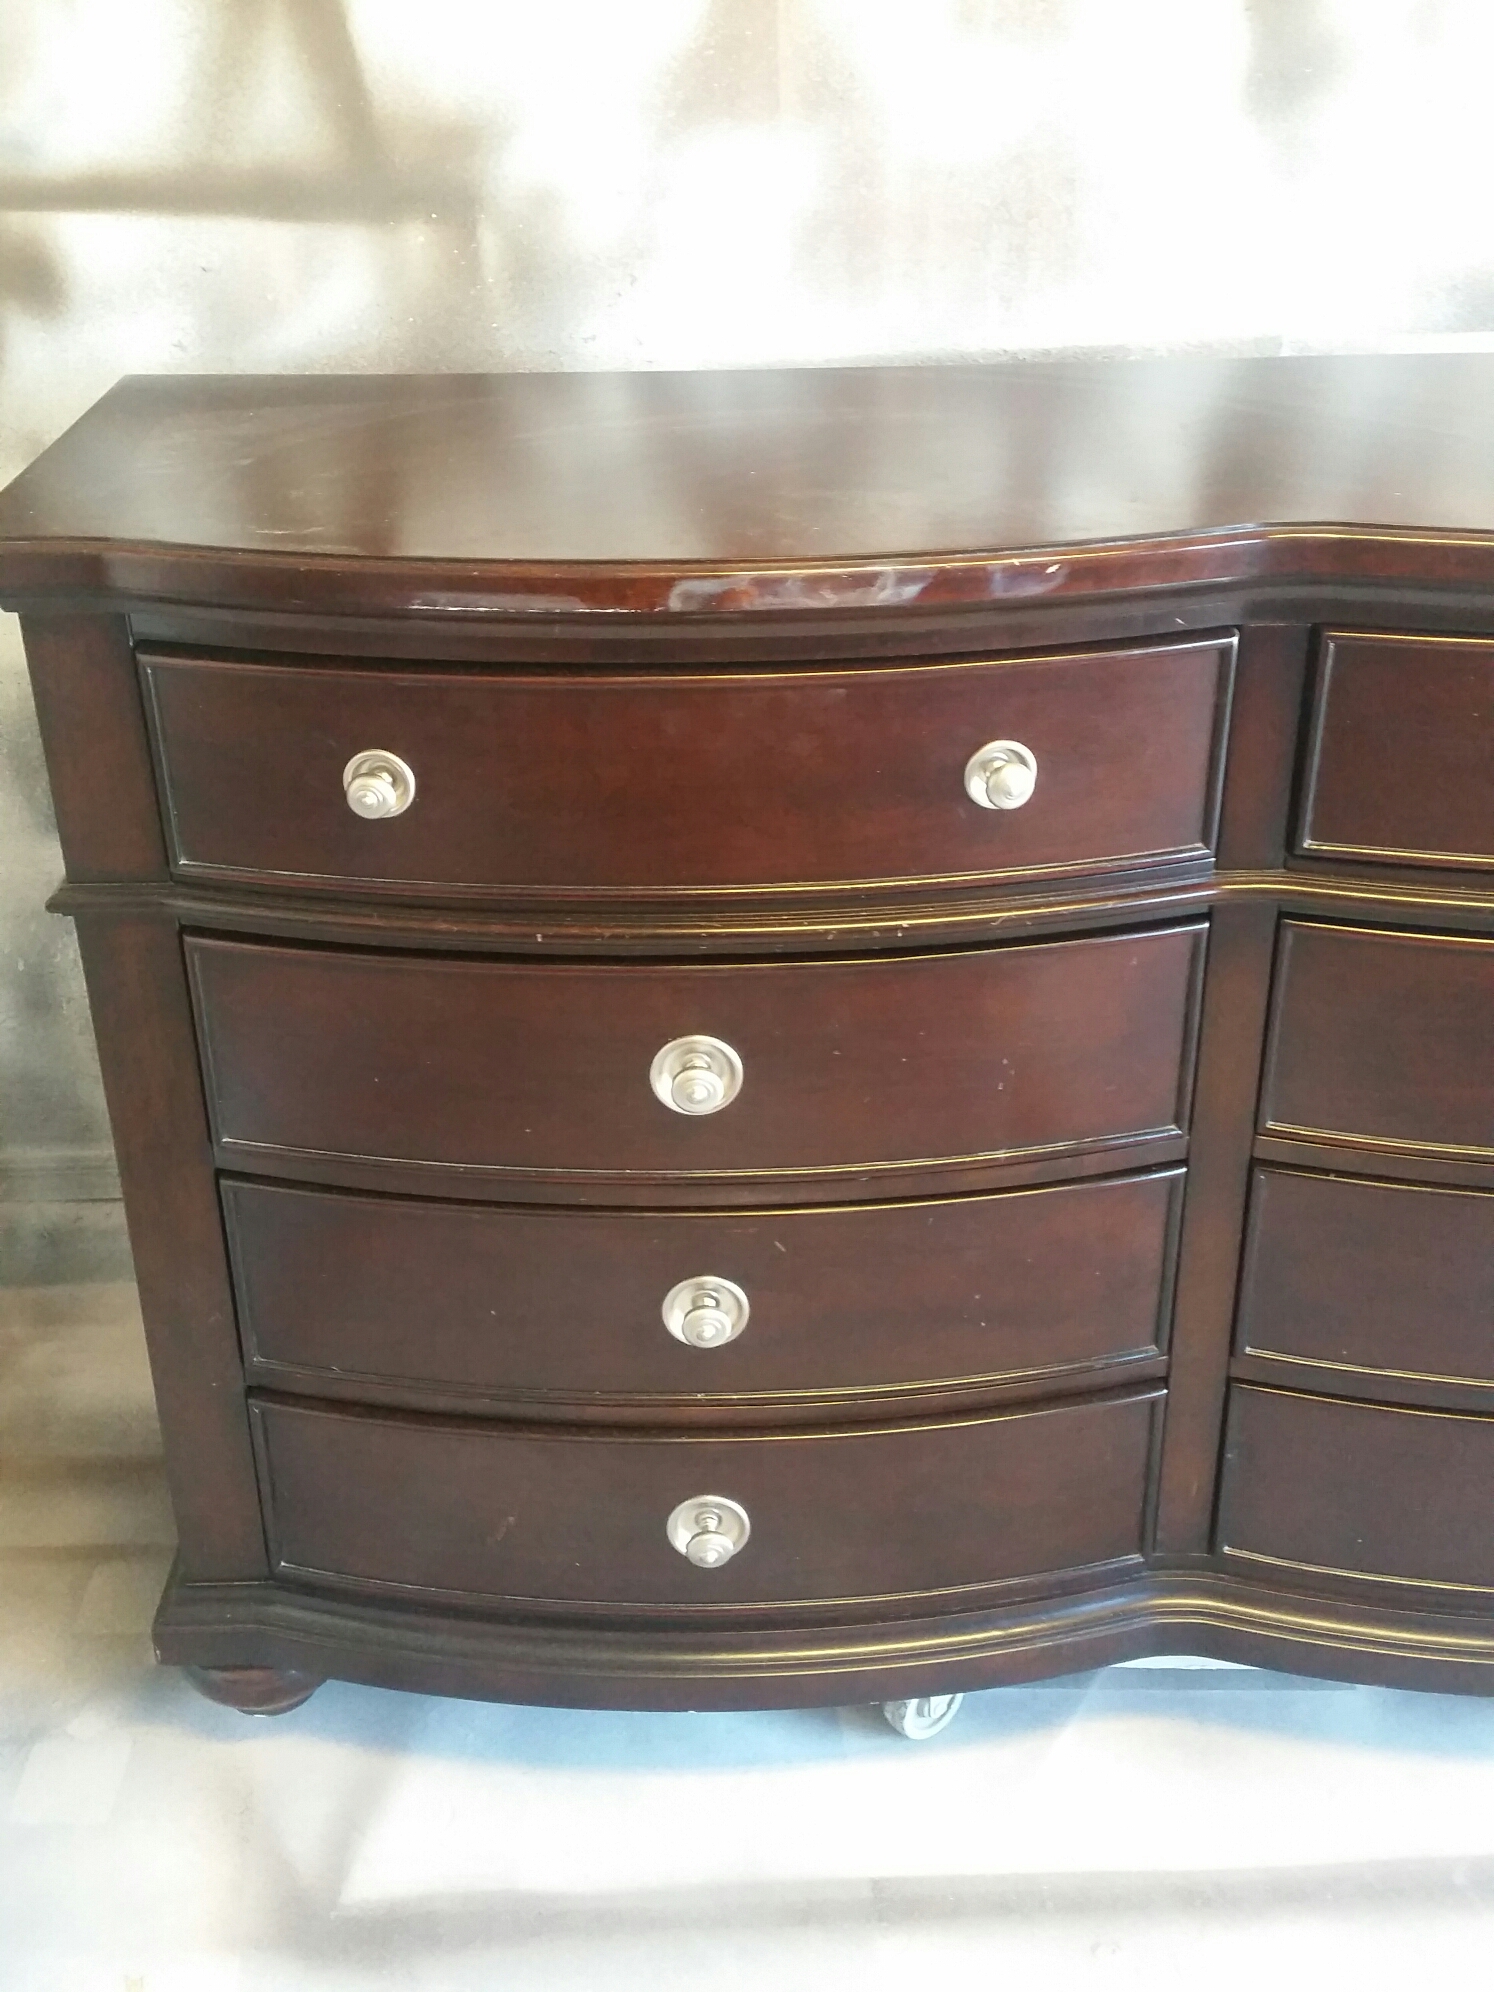
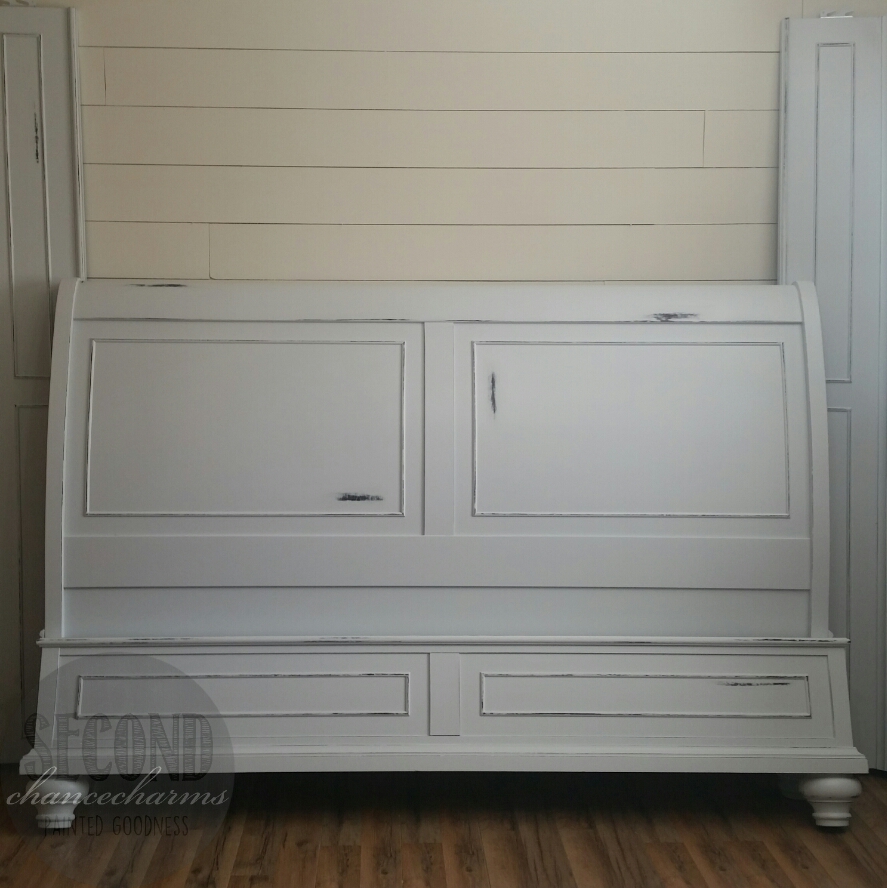
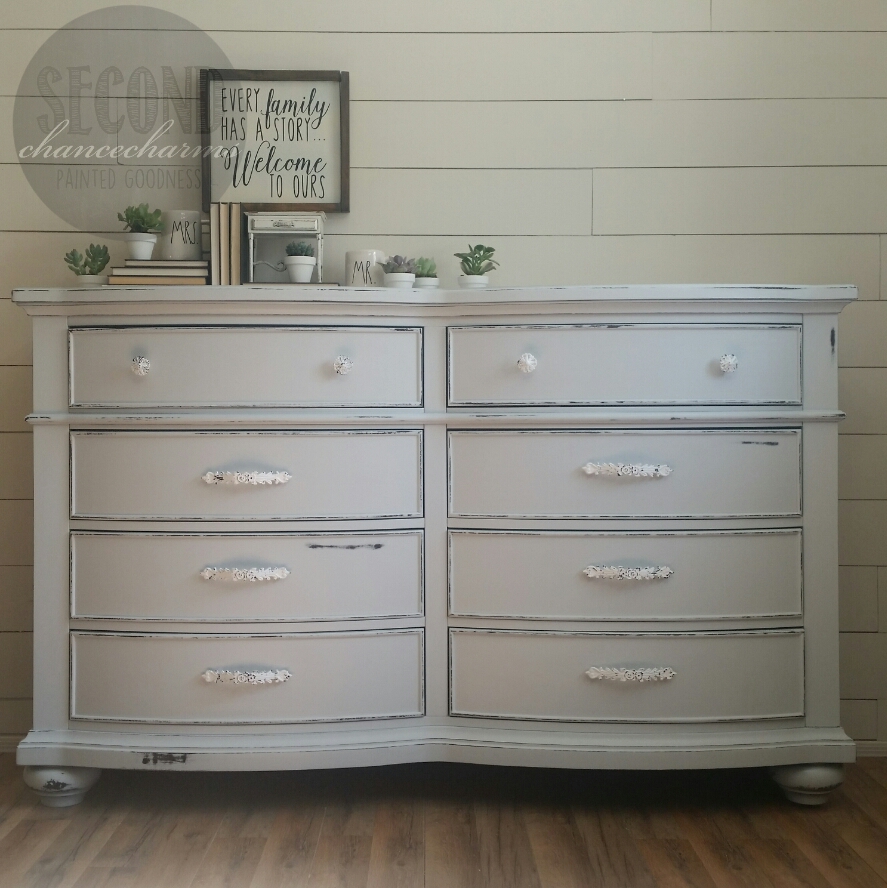
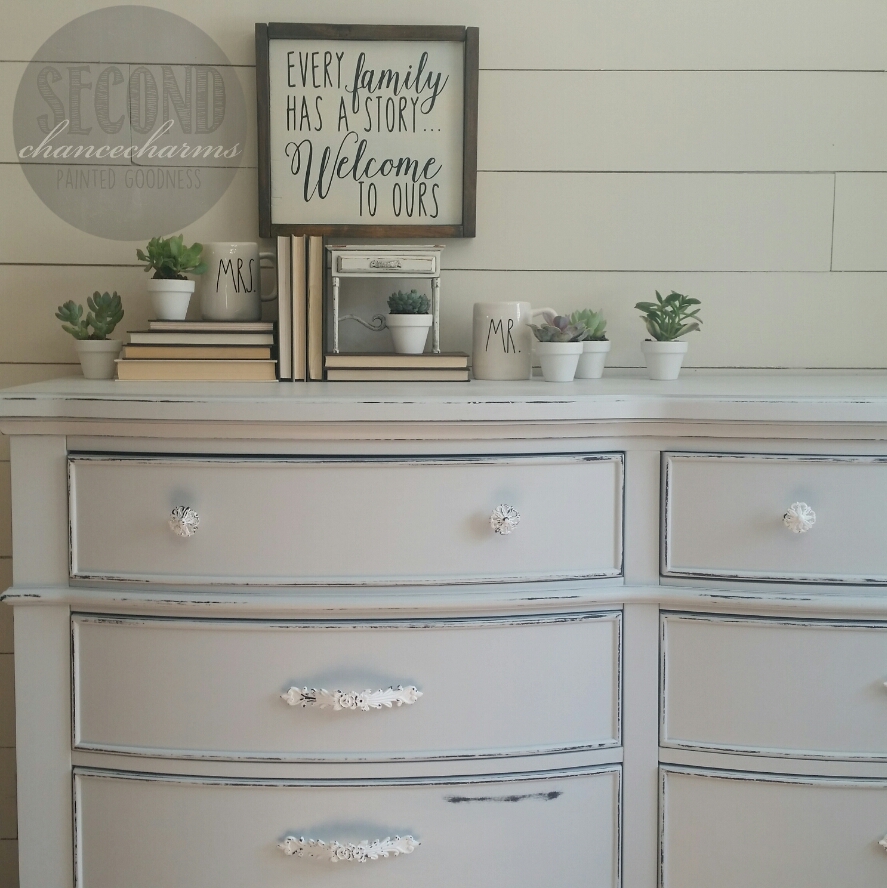
Last piece to be refinished to complete this master bedroom set. View the other pieces to this set at His and Her Nightstands and 8 Drawer Dresser.
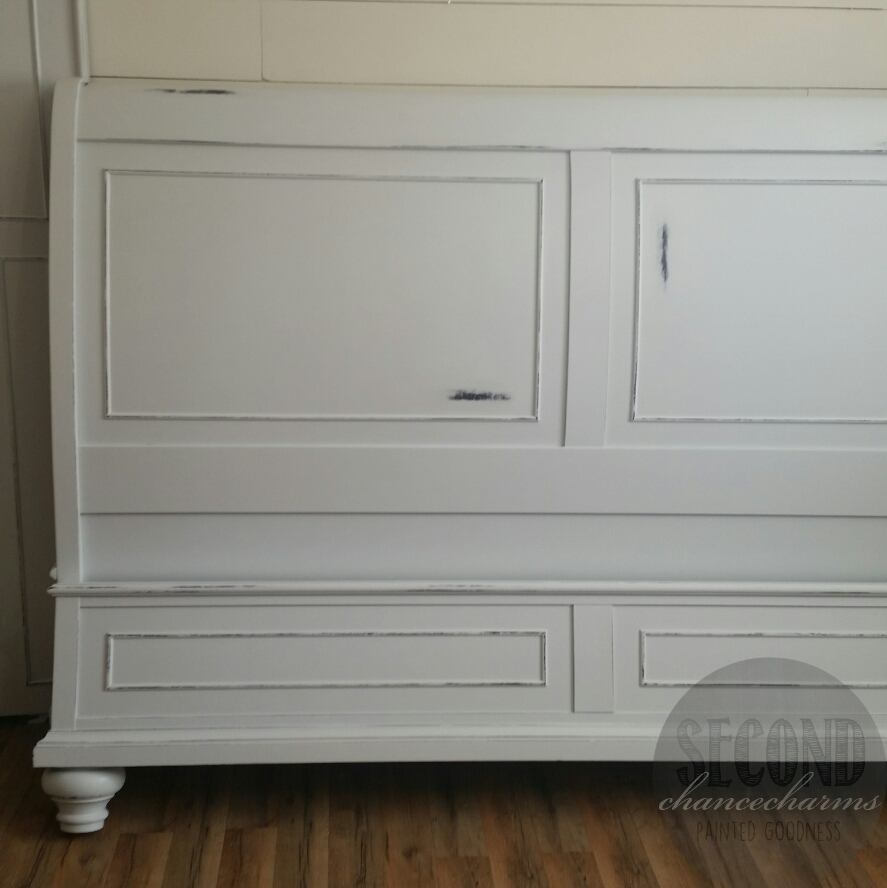
Refinished in Sherwin-Williams Reflection and lightly distressed.


Before:


Continuing with the custom master bedroom transformation from traditional style into farmhouse chic, today I am sharing with you the dresser. Yesterdays post of the His and Her Nightstands was a complete success on all media sites over at Second Chance Charms Instagram & Facebook page.


Refinished in Sherwin Williams Reflection and lightly distressed. Replaced knobs with some very adorable white distressed knobs and pulls from Hobby Lobby that my clients picked out.


Before pictures: